
Here is the decoupage tutorial I promised you from the Diva of a Dresser makeover.
Materials:
Wrapping Paper, Decorative Paper or Wall Paper
Fresh Sharp Exacto blade
Mod Podge
Spray Adhesive (optional)
Paint Brush
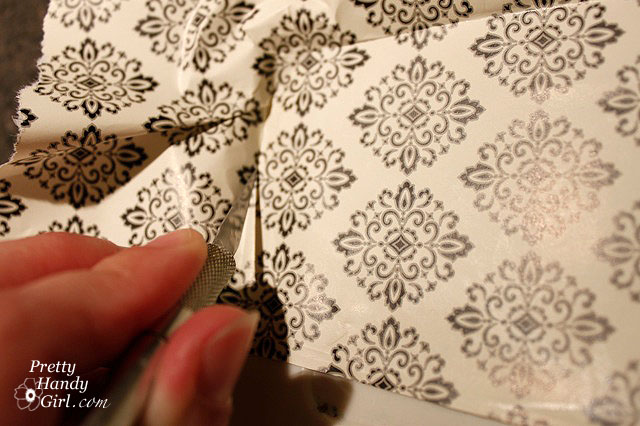
I started by unrolling a section of wrapping paper large enough to fit in the side pane. Using my fingernail (hmmm, maybe that is why I can never grow my nails longer ), I scored the edges of the wrapping paper along the edges of the panel.

Next I used a fresh exacto blade and carefully cut along the score lines in the wrapping paper (while still holding it against the dresser.) Set the paper panel aside.
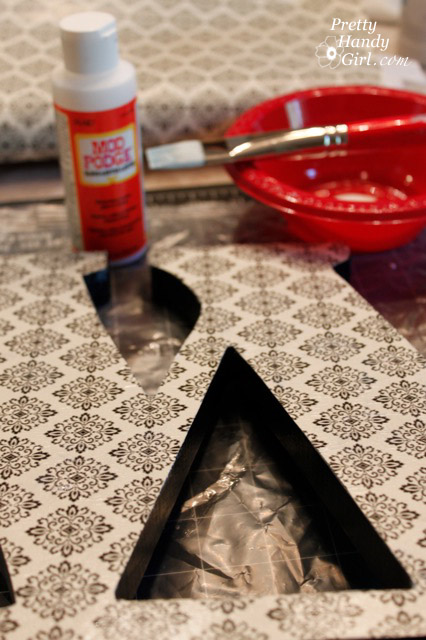
Using my paint brush, I worked quickly to put a coating of mod podge inside the panel on the dresser, while being careful to cover every square inch.
Center the wrapping paper on top of your modge podged dresser panel and smooth the paper with your hands, working from the inside center of the panel out. Getting the wrapping paper lined up in the panel was probably the trickiest part of the process.
Then I followed up with a top coating of Modge Podge to seal the paper. I knew the paper was going to wrinkle, and I convinced myself that I was okay with it ( being a perfectionist is tough sometimes.)

However, if you want to avoid the wrinkling, I tested the same wrapping paper on a wooden “W” and used spray mount adhesive on the back of the paper instead of Mod Podge.
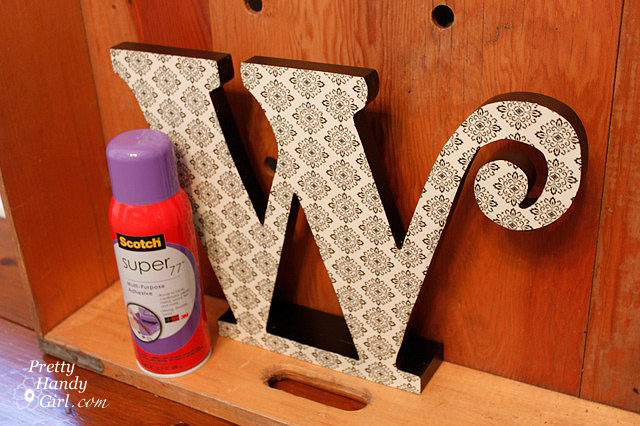
After top coating the “W” with mod podge there were still a few wrinkles but not as bad as the dresser. (See, I couldn’t squash my perfectionist ways. I had to solve that minor imperfection.)
This concludes my decoupage tutorial, but if you are curious about the lengths I took to give my decoupaged panel some age, keep reading.
I didn’t like the stark black and white paper on my dresser. In the middle of drinking my instant coffee I had a lightbulb moment!
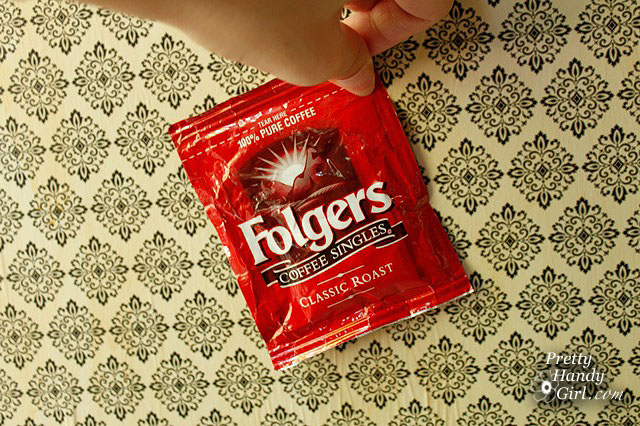
I decided to rub the instant coffee bag all over the panel. It worked, and gave the panel a nice warm “instant” age.
Later that day, I added my beachy blue glaze (all the while not being able to figure out why I kept smelling coffee. Duh!)

I played with adding the glaze and wiping some off until I achieved a hazy blue look with the wrapping paper design peeking through.

If you missed it or wanted to read more about this Diva of a Dresser makeover, click here.