

Want an easy way to add more architectural interest to your standard colonial door and window framing? Adding an extra piece of moulding, called back band, can add that extra boost of architectural interest.
And the good news is that you can do this to your existing trim moulding. No need to remove or start fresh! The only thing you will need is paint on hand to paint the moulding after you BEEF it UP! In essence, We’re gonna PUMP it UP!
Materials:
- Back band moulding
- Finish nailer
- 2″ finish nails
- Caulk
- Paint
- Miter saw or hand saw with miter box
Instructions:
There’s really not much to this tutorial. Line up the back band against your existing door or window frame. Measure or mark the back band where you need to cut your miter.

Then make your miter cut from that inside mark. Continue cutting pieces of back band for the top and opposite side.

Simply secure the back band to your existing trim with finish nails.
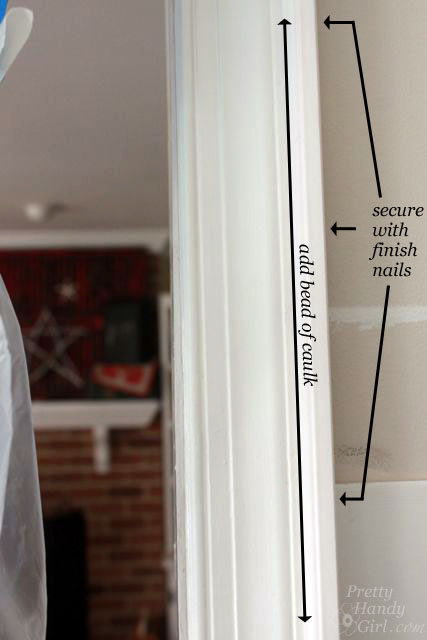
Then caulk the holes and the seam where the back band overlaps with your old moulding. Let the caulk dry completely and paint the moulding.
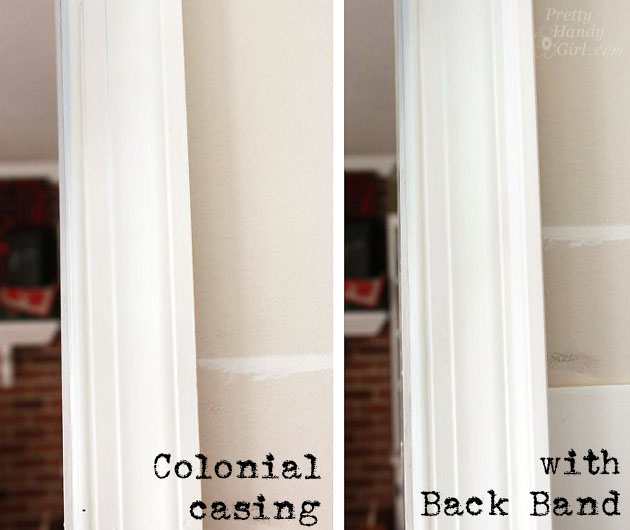
The added back band moulding creates more dimension and a classier look to your doorways and windows. The left side is the standard colonial casing. The right side is with the addition of the back band:

It looks great with the plank and Howe casing that I installed in the kitchen .
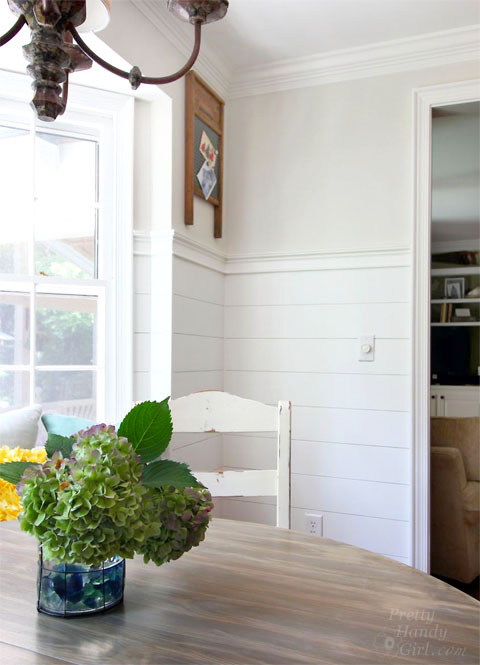
A thicker moulding can give your house a classier and more expensive look.
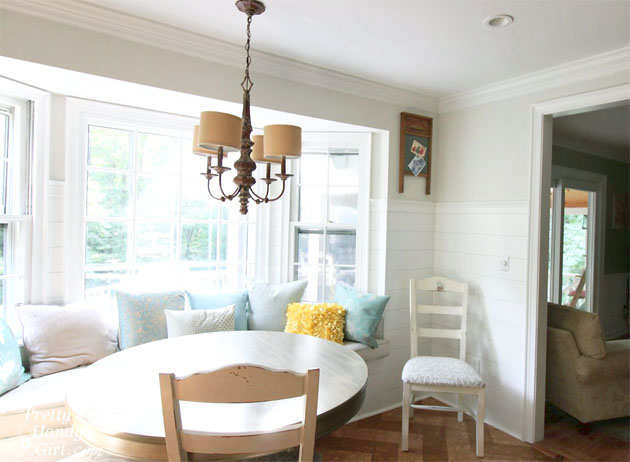
Psst. You don’t have to beef up your whole house. You can add back band to one room or a few rooms. It’s your choice. I added it to the kitchen when I was renovating it. Our living room had existing beefed up moulding, so it seemed only natural to continue it into the adjoining kitchen.
![]()
In reply to Cathy .
Not sure you’d want to do that as it will jut out further than your baseboard. But, you can look for other mouldings that would work nicely with your baseboard.
Can this be added to wimpy base trim?
I swear pretty handy girl, you are a genius. I love your work. I would be happy if I could do half as good.
In reply to cb .
Sure. Go shop the moulding department at your local home improvement store and get creative with what they have. Here’s a tutorial on adding more moulding to a window: https://prettyhandygirl.com/frame-casement-window/ See what I did at the top. That may be enough to give your husband something to attach the curtain rod to.
Hi! Thanks for this tutorial! My husband says we have to attach the window curtain rods to the window trim since we have antique plastered walls that he doesnt want to harm. So, I am thinking about beefing up the trim so that the rods can go out wider and higher from the window. Any other ideas on how I can do this???
Also, I tried to search your site, but can you please tell me what the wall and trim color is in the room above… I love how they look together! Many thanks!
In reply to Cassie .
Cassie, no I didn’t cut it straight. The bevel is facing in so you won’t see it. Just nail it from the side into your existing casing.
I had a quick question about the backband you used. In the link to the lowes backband you used it looks like the bottom of the band (the part against the wall) is angled. Did you cut it flat before applying or leave it angled. If you left it angled how did you apply it?
Thanks so much! I keep looking at pictures of backband with that angled bottom, and I’m so confused how to fit it around my casings!
window security product is unavailable on amazon with note they do not know if or when it will be available. any other suggestions ??
thought you would like to know
In reply to Hannah .
Hannah, excellent question. Yes, I’d shave back the baseboard moulding. A Dremel Multi-max is a great tool for doing that. 😉
Brittany, if you were installing this on an existing door frame would you stop above the baseboard, or would you trim the baseboard back to accept the back band?