

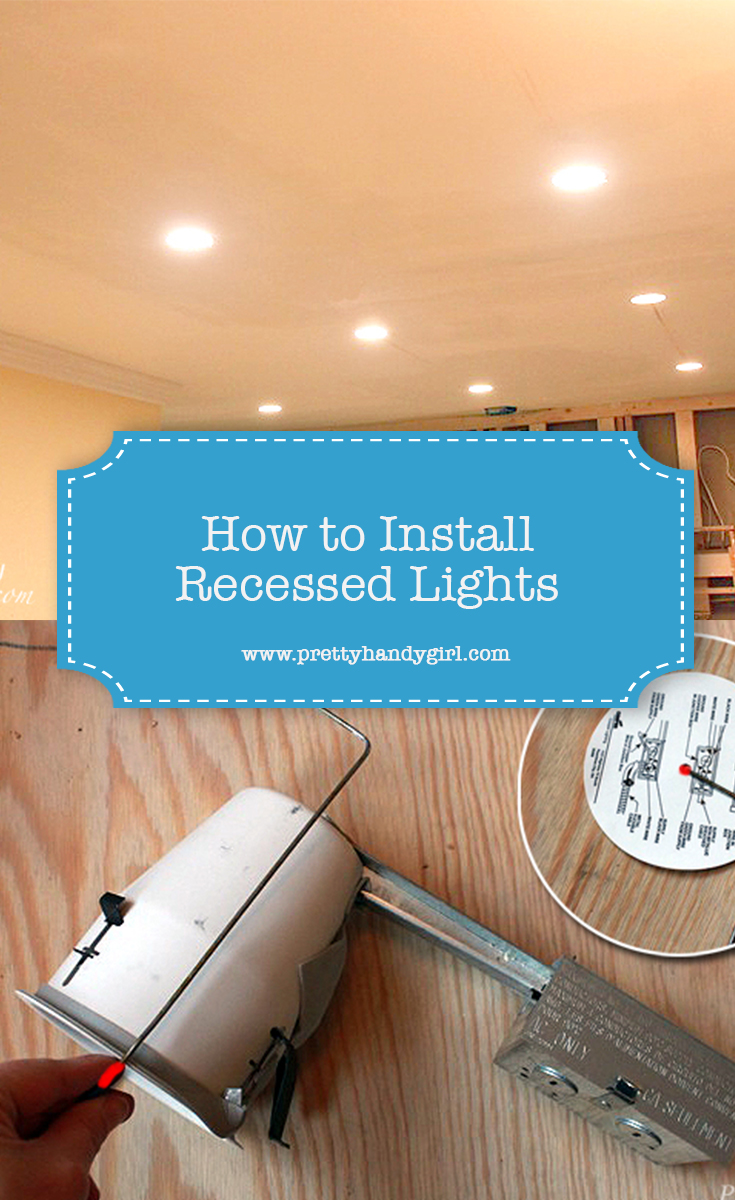
Kitchen progress is definitely moving along (hooray!!!) We now have recessed lighting in our ceiling and it really helps even out the lighting in the kitchen. Plus getting rid of the semi-flush light fixtures makes the ceiling feel taller.
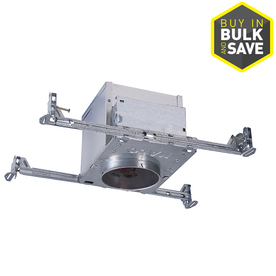
We debated about installing new construction recessed lighting:
 or remodel type recessed lights:
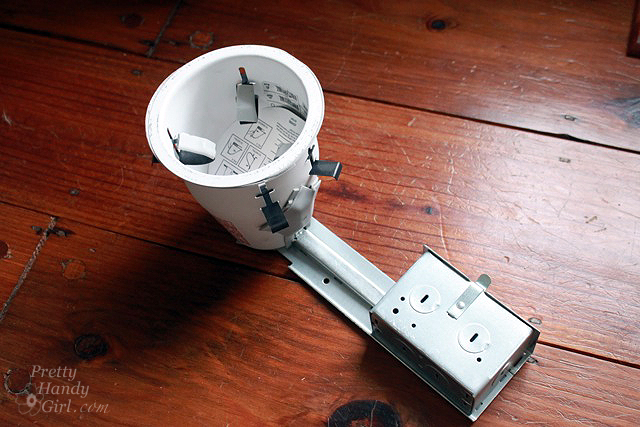
We could have installed either because our ceiling was already full of holes. Ultimately, we decided to install the old work (or remodeling type) lights because they clamp tightly to the sheet rock for less vibration. They also have a built in junction box with easy to wire connectors. (Did I mention that my son’s bedroom is right over the kitchen and there is a lot of jumping and bouncing that goes on up there!)
My electrician let me pal around and help him install the recessed cans after he ran the wiring. You know I took careful notes so I could share with you how to install your own recessed lighting fixtures.
Install Recessed Lights Materials:
- Remodeling recessed lights
- Light bulbs (be sure to get bulbs rated for your cans or they may blink out when the temperature gets too hot.)
- Wire coat hanger
- Pencil
- Piece of tape
- Hole saw (or drywall saw)
- Wire strippers
- Wire cutters
- Flat screwdriver
- Utility knife
- Hammer (optional)
Install Recessed Lights Instructions:
First determine where you would like your light installed. Hire an electrician to run electricity though your ceiling if there aren’t already wires accessible. Remove the paper template from the recessed can. Trace onto the ceiling with pencil.

My electrician showed me how to make this cool tool out of a coat hanger to determine if there are any obstructions in the ceiling.
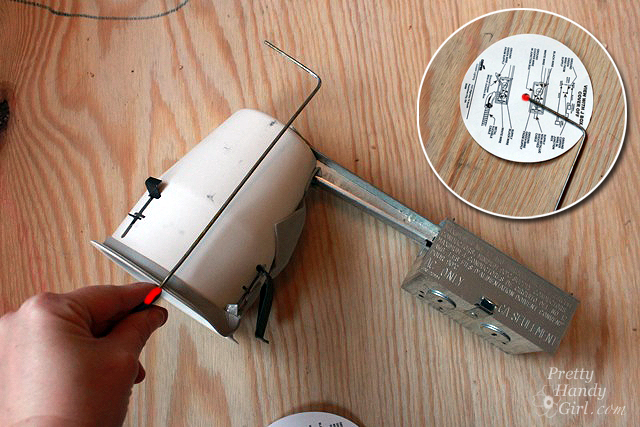
First bend the wire to the radius of the paper template (from the center to the exterior edge.) Next place the coat hanger against the side of the can. Extend the bent end an inch or so above the can and then wrap a piece of tape around the hanger where it meets the bottom of the recessed light (shown by the red line.) Here is what the tool looks like when you are done:

Press the bent end up into the center of your traced circle. Then press the hanger up into the ceiling until you reach the tape. Spin the wire around. If it doesn’t hit anything you have the clearance you need to install the recessed light. If you hit something, you’ll need to relocate the light to another location.

Cut around the pencil line into your ceiling using a drywall saw. Or you can use this fancy hole cutter my electrician uses. It attaches to the drill and has a spinning blade that cuts the hole. The bowl around the blade catches all the drywall mess. Genius!

Pull the wires that the electrician ran through the hole.

Grab one of the recessed light fixtures. Remove the cover from the junction box. Use the flat screwdriver to break off the slot(s) in the side of the junction box. You’ll only need to break off one tab per wire. (If you have two wires, the fixture is in a daisy chain and electricity runs to another fixture from that one. In that case, break off two slots.)

Feed the wire(s) through the slot(s) in the side of the junction box. Pull them through about 6 – 8″ to give you enough room to work with.

Gently score the plastic coating of the wires. Then cut off the plastic coating and the paper coating from the wires. Finally strip off about 3/4 of an inch from the end of the black and white wires.

Spread out the wires in the box and locate the ones attached to the light fixture.

Here comes the easy part! Attach the newly stripped wire to the same colored wire from the junction box by firmly inserting the wire into the wire connector. [White connects to white; Black to black; and bare to bare (or green).] Gently tug on the wires to make sure they won’t slip loose from the connector.

Gently fold the wires back into the junction box, take care to keep the black and white wire connectors separated if you can. Replace the cover onto the junction box.

Feed the light fixture into the ceiling hole by inserting the junction box first. Then press the recessed can up until it is flush with the ceiling.

Locate the four tabs inside the light fixture. Use the flat screw driver to press the tabs through the light fixture. You may need to bang on the screwdriver with your fist or a hammer to set the tabs to lock against the ceiling.

Insert light bulb(s), turn on the power, and switch on those beautiful recessed lights!

I had to share this some-ecard with you that BigMamaCass ( an amazing photographer ) shared with me on Instagram . I was ready to publish this post and get it out before my email feed went out at 8pm. Then the power flickered and wouldn’t you know that the internet went out! I can’t think of anything more frustrating for a blogger. So, this image she sent brought a good laugh from me.
I hope you have no internet outages and a great rest of your week!

Pin for later!
In reply to Jerry Bloomer .
Jerry, LOL. No, that was the wiring my electrician put in the walls for the vent hood and cabinet lighting. He loops it so that there is plenty extra and it’s easy to find after the drywall is installed.
Brittany. I was a little distracted by the first picture with all the wire looped inside the wall. Is all that part of the can lights?
So glad I saw this post, everything I needed to know all in one place. Great tutorial!
[…] How to Install Recessed Lights […]
[…] How to Install Recessed Lights […]
Lookss great. The house i have has no ceiling fixtures. So im trying to outfit the pour thing with something stylish but functional.
Thank you.
In reply to china .
China, you have to run wiring to each location ahead of time. Then as I showed in the tutorial, you’ll push both sets of wires into the connector to chain them together.
After you took the old fixture out and connected the first recessed light how did u connect the rest of them?
In reply to alisa .
It all depends on your area and how much your electrician and plumber charge. We were able to move the vent stack ourselves. But, I already had an electrician re-wiring the whole kitchen, so I’m not sure how much that was individually.
HI Brittany,
It’s been a while since you did this but is it a huge expense for electrician and plumber to move wiring and a plumbing pipe in the bulkhead before installing the lighting? I’m just trying to figure out if it’s worth it.