
How to Paint an Ombré Wall Technique

Ombré painting is EVERYWHERE. Clothing, home décor and even wall paint techniques. An ombré wall is the paint technique I chose to create a misty and ethereal look in our master bedroom. It started when I fell in love with Kendall Charcoal by Benjamin Moore but didn’t want to make our entire bedroom too dark (I have a hard enough time waking up in the morning.) I decided a good solution was to use the dark charcoal gray color on a focal wall behind the headboard. But, I didn’t want to stop the color in the corners and create a sharp line.

Instead, I wanted a softer edge that would make us feel like we were being hugged by the room.
How to Paint an Ombré Wall Technique
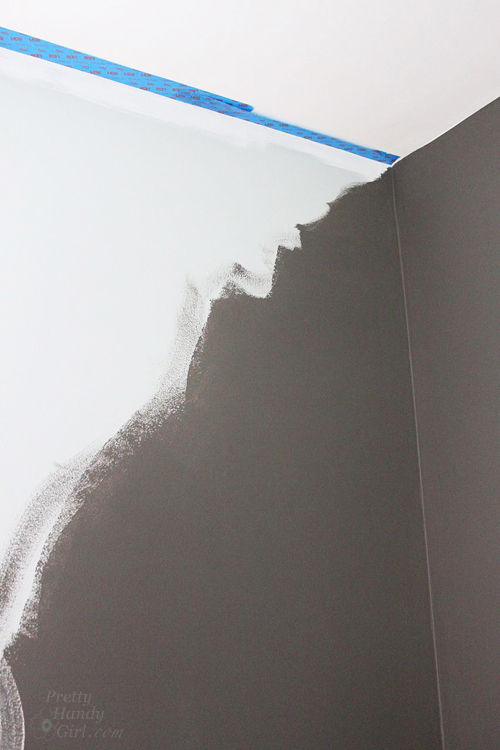
I used Revere Pewter by Benjamin Moore to paint the other three walls in the bedroom, but created a random ragged edge where the two colors meet.
This is how the side walls look in preparation for the ombré wall technique.

Materials:
- Dark latex paint color (Kendall Charcoal by Benjamin Moore)
- Lighter latex paint color (Revere Pewter by Benjamin Moore)
- A small container with a mixture of the two colors to create an in between gray
- Paint brush
- Dry brush
- Water-filled spray bottle
- ScotchBlue Painter’s Tape
- Damp car wash sponge
- Rubber gloves
- Wet wipes or wet rag
Instructions:
Apply painter’s tape onto the ceiling and window or door casing to protect them from paint.
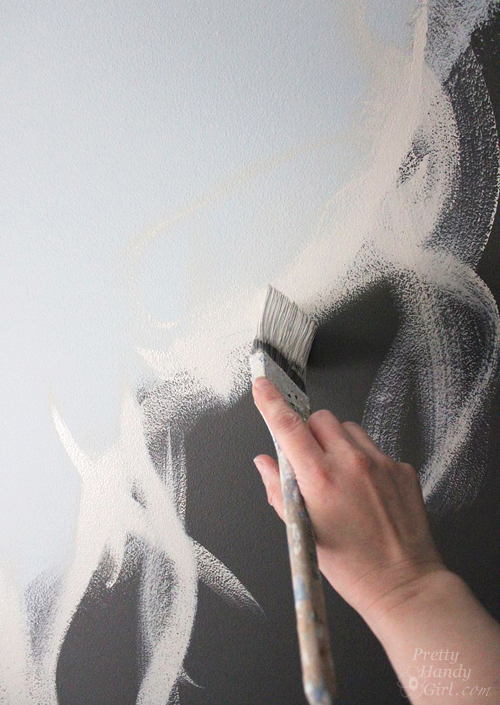
The key to a great ombré technique is to keep your paint wet as you work it back and forth into the dark and light areas.
Start by painting some of your in between gray paint up and down between the two colors. Use the sponge to pat the paint around and out from the brush strokes. Use the dry brush to feather the edges.
You’ll see what I mean in this video tutorial:
Be sure to step back from time to time to get a better look at the wall. I learned in art school that when you like something, it’s best to stop before you over do it.

Keep your ombré random for more visual interest.

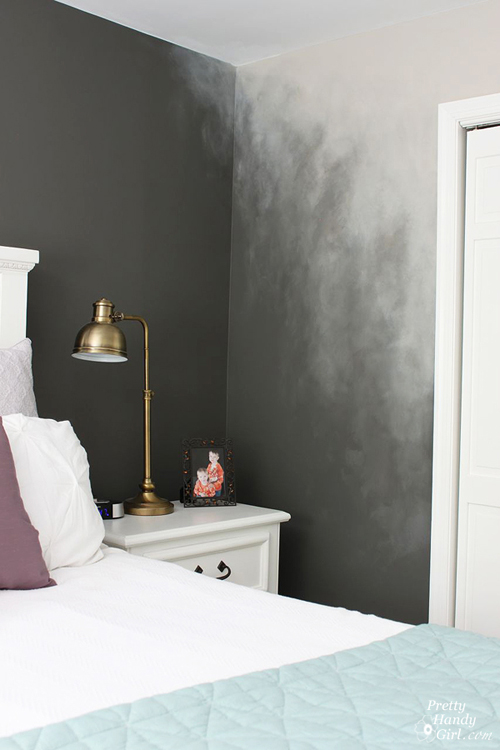
What do you think? I had a lot of comments when I first posted the wall on Instagram . There was quite the debate over whether people liked it or not. Apparently several people thought it reminded them of a natural disaster.
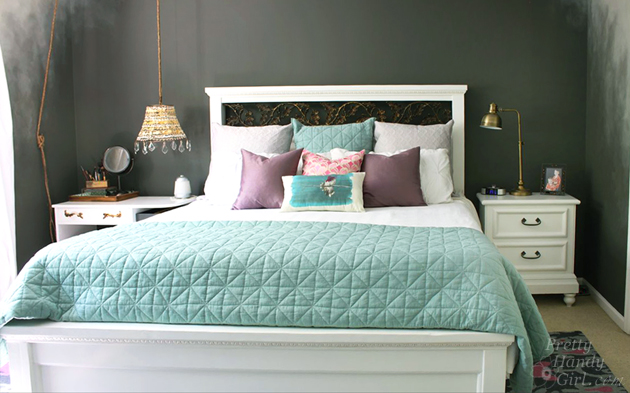
I don’t know about you, but I LOVE IT! And it really does make it feel like there’s a mist moving into the room.
So, do you love it or hate it? Do tell! I’m a big girl, I can take it.
![]()
Psst. Don’t forget to enter the HomeRight Paint Stick giveaway ! It shaved a lot of time off of my painting process!
In reply to Emily Voss .
Good analogy!
Love this! I’m from San Francisco, and it reminds me of the fog rolling in.
Amazing, mystical, serene and beautiful all in one, I will do this, Thanks for the tutorial.
Looks pretty. That is a work of art ! I wonder how you could do that with a sprayer.
Thanks for sharing, will put this in my bedroom. As an overlay reaching from one corner I am going to put a tree with branches hanging in the lighter part of the ombré. All in shadow form, it will be beautiful.. Thanks so much for the inspiration
It’s stunning.
This is nearly exactly the kind of technique I ant to do! Ty for the video, it explains so well. I want a watercolor like wall but the murals are very pricey – around $200 for just one wall in a half bath. So this technique will be perfect!
I love this. Having done faux finishing professionally I would do this in my home. I see putting crystals through the lighter color then having them get smaller and further apart, more random where if fades into the dark. May be my next finish. I can’t wait to explore your other projects. This is my first of your work.
thanks for the technique – its just what I needed to finish my project 🙂
I love it. It looks like you caught the cast shadow of a tree or bush from a window…