
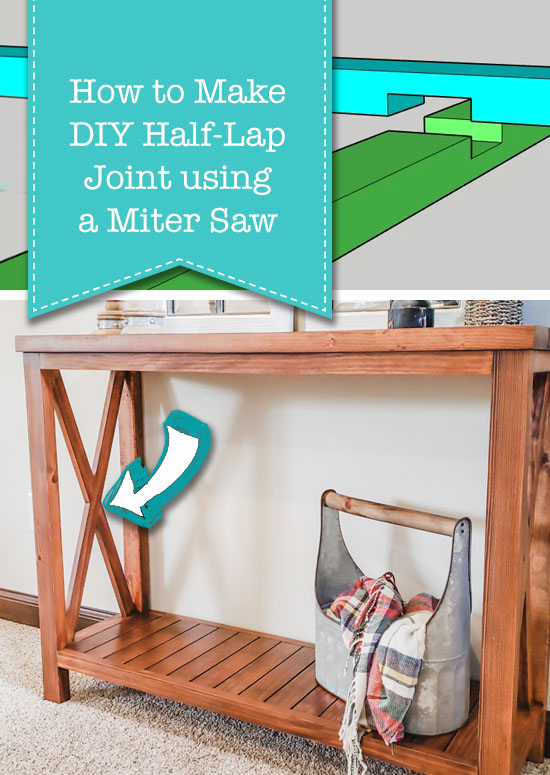
Want to add another joint to your woodworking skillset? Today I’ll show you how to create a simple DIY half-lap joint with your miter saw.
Half-Lap Joint with your Miter Saw
Hi! It’s Kristen from In Her Garage and I am going to teach you an easy way to create a half-lap joint to add to your DIY skill set. The half-lap joint is versatile and super strong.
Wondering what a half-lap joint even is? Put simply, a half-lap joint is a joint between two boards that are halved together so that a flush surface results. Check out the pictures below for two popular ways half-lap joints are used. Best of all this joint only requires wood glue to hold it together.


I have used this style of joint when a butt joint or pocket-hole joint isn’t possible. It’s helpful to use when working with thinner material or in tight spaces. Let’s learn how to make a half-lap joint!
Materials:
(I’ve included affiliate links for your convenience. I earn a small percentage from a purchase using these links. There is no additional cost to you. You can read more about affiliate links here .)
- 2 boards to be joined together
- 2 sacrificial boards for use at the miter saw
- Wood glue
- 120 grit sandpaper
Tools:
Instructions:
Step 1: Mark your boards
- Place your boards over one another in the orientation they will be joined.
- Mark out the width of the overlap on each board.


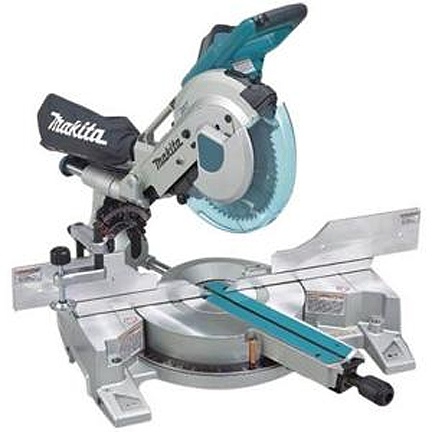
Step 2: Set up your miter saw
- Place a sacrificial board against the miter saw fence, with the face flat (as seen in the video below). This board should be flat and square. You will need this because you are not cutting through the board to be used in your project and thus the miter saw will not cut the back portion of the board you are cutting. The scrap piece will push your board out so that the miter saw will cut halfway down from the front to the back. If you do a test cut without the scrap board you’ll see what I mean.
- Next, use your saw’s depth stop control and adjust the depth to cut approximately halfway down into the first board to be cut. Use a scrap piece of wood for this step to make sure you have the depth you want before using the board that will be used in your project.
- Adjust the miter angle at this time as well if you are not planning to cut at 90 degrees.
Step 3: Cut the first board
- With your depth set and scrap board in place make your first cut into your board. Make sure you are minding which side of the marked lines your blade needs to cut!
- After the first cut move the board slightly (about 1/8”) and create another cut right next to the first.
- Continue moving and cutting until you have created all the cuts needed between the two width lines you marked out previously.
- Dry fit the second board into the first to make sure the width is correct and make any necessary adjustments.
- Use sandpaper to smooth out any ridges left from the saw.
Step 4: Cut the second board
- If you cut exactly halfway through the first board then you will not have to do any adjustments for this step and you can cut the second board exactly as you cut the first.
- But, if you are like me you didn’t cut the first board perfectly and the depth will need to be adjusted slightly for the second board. This is simple.
- The cut for the second board will need to be the depth of what you DIDN’T cut from the first board. Use a piece of scrap to fine-tune this depth before cutting the board you will use.
- Now that the depth has been set for the second board you can cut the half-lap into the board just like you did for the first. Again, being mindful of which side of the lines your blade is cutting.
- Dry fit the two boards together to be sure you have a snug fit and the boards create a flat surface.

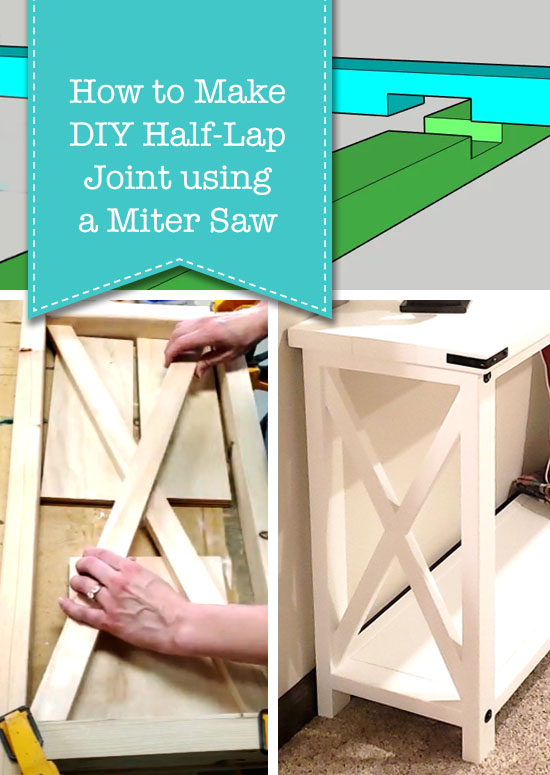
Step 5: Glue together
- Apply glue to both lap joints in each board and fit them together.
- Apply downward pressure to the joint and allow the glue to dry.
There you have it!! You have expanded your talents and created a very strong half-lap joint for your next project. Nice work!
Pin this graphic for future reference:

New to using the miter saw or need a refresher? Check out the Pretty Handy Girl’s How to Use a Miter Saw tutorial to get you all caught up!
![]()

Hi! I’m Kristen, from In Her Garage, and I am a self-taught woodworker and DIY fanatic from Minnesota where I live with my husband and our two daughters. Between being a wife, mom, and registered nurse, I try to make as much time for DIY as possible. My love for building came after our family built our current home in 2015. After we moved in, we needed furniture, and instead of spending massive amounts of money to order the items we wanted I decided that I would build them myself. I started with a buffet table plan from the fabulous Ana-white and quickly set out to remodel my entire home office .
Since then I have started a side business building furniture for the people in my community. I love hearing my clients talk about the pieces they wish they had whether it be a rustic buffet table , a one drawer side table , or a toy box and then making it a reality for them. While starting my small business it made perfect sense that I would document my building journey so I simultaneously launched the In Her Garage blog and I love sharing my plans, tips, and tricks.
I am so glad that you found me here and please feel free to connect with me on Pinterest , Instagram , and Facebook to see what I am working on right now.
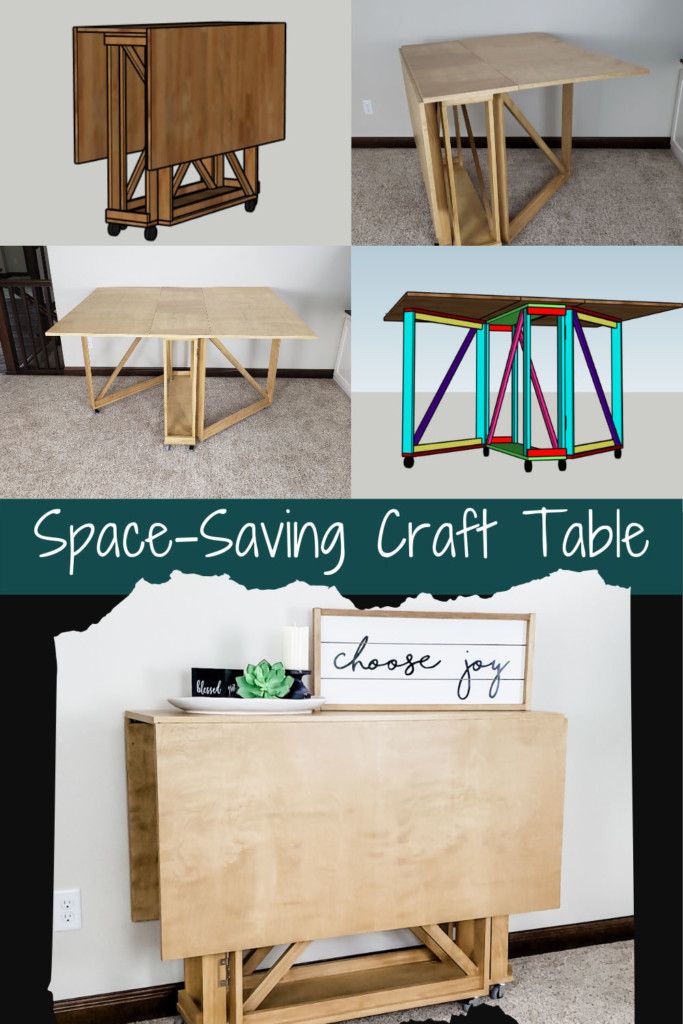
Check out my latest blog post about building a DIY Folding Craft/Sewing Table! This table is large enough for any craft project but folds down when you don’t need it. Perfect for anyone with a small space but large crafting ambitions!
[…] example, if you are hesitant to pick up a power tool, you’ll love my Tool Tutorial Friday series where I show how to use power saws, nail guns and much more! So, if you want step-by-step tutorials […]
[…] Transfer the dimensions to your beadboard/luan and cut your pieces with the circular saw or jig saw (learn how to use these power tools and more in the Tool Tutorial section.) […]
OK, that sounds easy enough. I’ll view the tutorial again. Yes, I have a drill & I’ve heard so much about this jig. I’ve been stewing about what to do about making my own frames. The expense of buying frames are ridiculous so this was such valuable information just at the right time. Thank YOU!
In reply to Colleen Taylor .
Colleen, honestly, to get good tight joints for frames (and other things) I highly recommend the Kreg Jig (assuming you have a drill). It is inexpensive and relatively easy to use (follow my tutorial above.) And you can use it for soooo many things. I think a nail gun would work fine if you glue the joints first, but it’s not as strong as pocket hole screws. 😉 Here’s a link to the Kreg Jig Jr. which is all you’d need: http://www.amazon.com/Kreg-R3-Pocket-Hole-System/dp/B000J43A7W/ref=sr_1_3?ie=UTF8&qid=1390916988&sr=8-3&keywords=kreg+jig
This is really great to have Brittany. I do have a question though for you. I need to make some rather small frames for some of my small canvas paintings. They will be odd sizes (like a 6 x 8 or so) since I’m mounting the canvas to a board. What kind of tool would you suggest for joining the frames together. I have a miter box to cut the molding (which I still have to purchase) however, what is the least expensive tool to buy to join the frame pieces together perfectly?
Years ago I used to make my own frames at one of those DIY shops where you picked your molding & you made it in the shop with a vise & their supplies.
In reply to Amanda Sonnier .
Amanda, I haven’t actually needed to plunge cut with a circular saw yet. When I do, I’ll make you a tutorial ;-). The only time you’d use it is when you don’t want to cut from the end of your wood. As in joinery.
I just watched your circular saw video, and I love it. But I would really like to see a tutorial explaining plunge cuts with a circular saw – how to do them, and when to use them.
[…] it’s another episode of Tool Tutorial Friday! Do y’all miss TTF? I do too, but this handy gal only has so many tools in her toolbox. I […]
Thank you for your tool tutorials. You have taught me how to use my miter saw, ciculare saw, nailer and air compressor, and a refresh using my kreg jig. You are a great teacher!
[…] look at this! Tool Tutorial Friday is back! Today I have a great tool for creating strong joints when building with wood and furniture […]