
If you stuck through my ugly post yesterday . I have some pretty pictures for you today!
Two years ago I happened upon a cute little bench being thrown out with a neighbor’s trash. (I am addicted to trashed furniture. In fact, I have a NASTY chair in my garage that needs a lot of help structurally and asthetically.)
The roadside bench was painted a very blah beige color. I brought her home and gave her some decorative lines and a monogram. At the time we didn’t have anywhere to sit in our mudroom, so this little bench served the purpose well. Later I built a big mudroom hallway bench with built in shoe storage (I promise to create a tutorial for that at a later date.) So, this little bench was moved to the guest room where she sat by the window until this week.

The first thing I did was give her a little rub down with some sand paper. Then I laid down 3 coats of fresh shiny white paint (leftover from trim and moulding painting).

I used some old foam I saved from our move (only 3+ years ago). This foam was the packing material used to ship ice cream cones! I received it from a nice woman off of FreeCycle.org and thought it could be used for a cushion at some point.
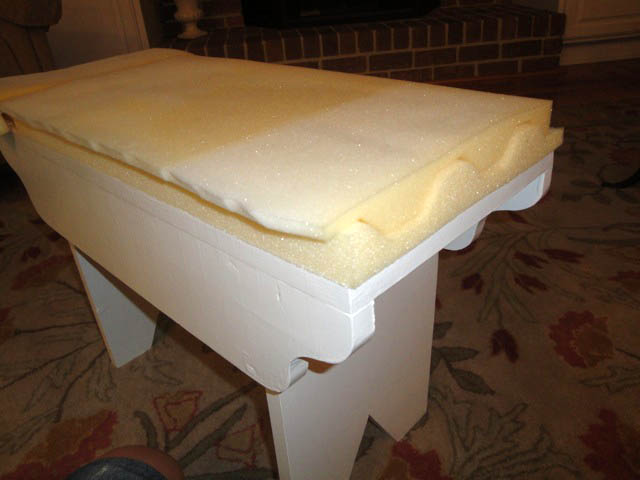
I cut some batting to fit over and wrap around the foam (so as to hide all the seams in the foam).
Then cut the arms off of an old t-shirt of Pretty Handsome Guys (don’t worry, he had already said goodbye to it.) And cut up the sides so I could use just the back of the shirt.

And finished off with the decorative fabric cut slightly larger than all the other layers.

I carefully folded my decorative fabric under being sure that I had the old t-shirt hidden in the fold. And put in two staples with the staple gun to hold the fabric on the one side.
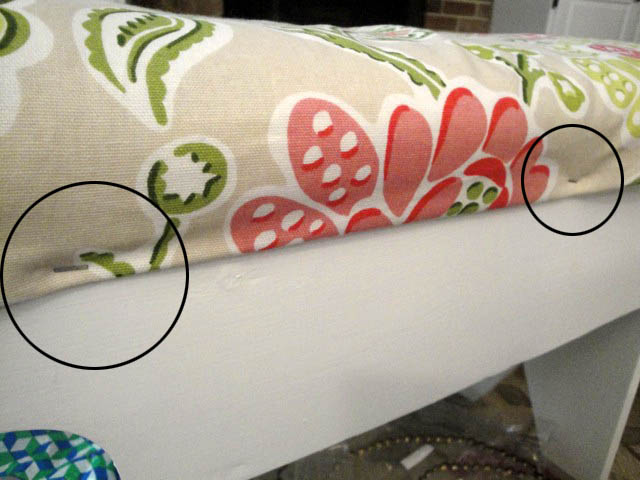
Moving over to the other side, I cut the t-shirt, batting, and decorative fabric down to size being sure to leave about an inch excess on the decorative fabric.
Then I repeated the same fold under and put in two staples.
Now for the bling! I had plenty of leftover nailhead trim from this project (check that link out if you need a better tutorial on adding nailhead trim.) I began at the corner of the front of my bench and added the starter nail.

At this point my 6 yr. old had come over to my side telling me how bored he was and, “What can I do now?” I asked if he wanted to help me hammer. Once I started each nail, he was able to hammer it into the nailhead trim for me. (I did have to finish a few off myself.) We worked together adding the nailhead trim to the front and back of the bench.
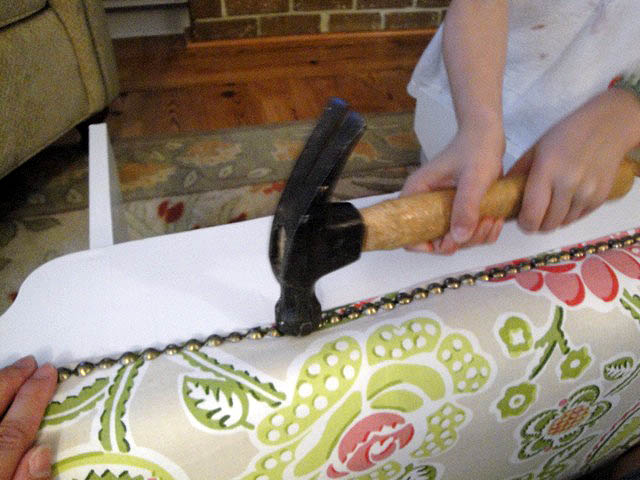
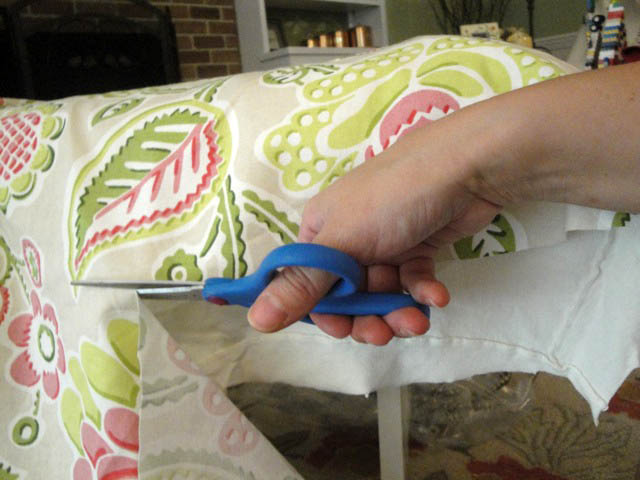
Before adding the trim to the sides I neatly folded and tucked under all the layers (cutting excess off when necessary.) Until it looked like this. Then I added the trim on top to hold the fabric in place.

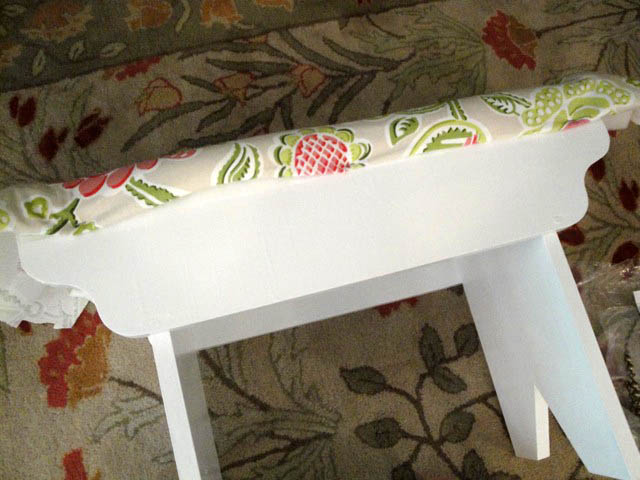
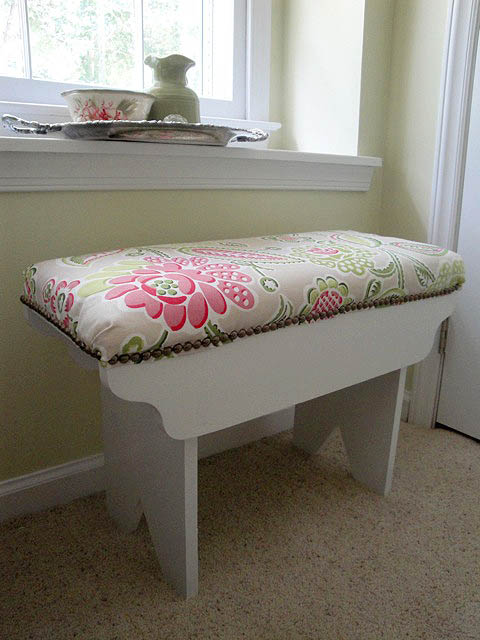
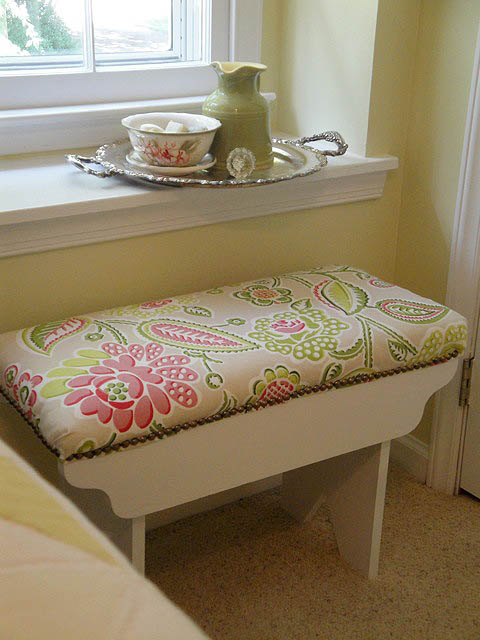
And there she was, my beautiful cushioned bench for our guest room . I’ve been busy trying to finish a few projects ( rebuilding a curbside chair and making a night stand from a door and picket fence ) in this room before my best friend from high school comes to visit. Nothing like a visitor to get your DIY butt in gear!

[…] To secure the foam, cover the foam with the old t-shirt. Trim and staple the edges. Repeat the same process with your furry fabric. (Need more upholstery tips, you can read how I upholstered a roadside rescued bench.) […]
[…] Pretty Handy Girl made a small cushion for a charming, small bench and we’re in love. This one even has some studded accents! […]
[…] Check out this trash to treasure find, Brittany, at Pretty Handy Girl transformed from sad to fab! Upholstering Little Bench-A sweet spot to land just made me smile! I’m always amazed at the remakes I see, and this is an no exception. […]
[…] Bench Cushion Reupholstered […]
So cute! The fabric is sweet. Great job! ~Pepper
[…] Nailhead Trim Bench October 8, 2011 By Beckie // Pretty Handy Girl Brittany had a little bench that was formerly a roadside find from a couple years back. The once blah beige […]
I love this project! I am going to do this to an old bench I got a garage Sale a few years back. GREAT! Thanks for sharing!!
Brittany,
Congratulations, your bench made this week's Top 5 Hits at Singing With Birds. Come check it out, grab a blog button and have a great weekend!
You are ridiculous! This is amazing ! I'm gonna have to follow :]
Thanks for linking up to the Mad Skills party!