
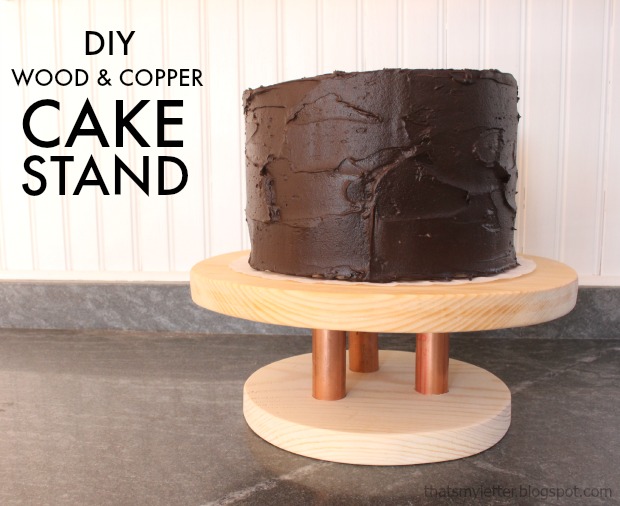
Hello Pretty Handy Readers – Jaime here today from That’s My Letter to share a diy project that combines two of my favorite materials: wood and copper. I’m sharing how to make this wood and copper cake stand.
This is a fairly simple project that could be tailored to fit your style with paint or stain. I choose to leave the wood natural, only sealing it with clear polyurethane, because I love the contrast of the wood against the chocolate frosting (and most cakes around our house are made with chocolate frosting!).

The warm shiny copper is the star of the show here and can easily be found at any hardware store.

Supplies:

- 1×12 pine board scrap @ 10″l
- 1×8 pine board scrap @ 7 1 /4″l
- 3/4″ copper piping @ 12″
- 3/4″ wood dowel @ 12″
- pipe cutter
- jigsaw
- finish nailer & 1 1/4″nails
- drill & 7/8″ spade bit
- measuring tape
- pencil
- sandpaper
- clear satin spray polyurethane
Instructions:
Step 1: Use a plate or other 10″ circular object to trace a circle shape onto 1×12 scrap.
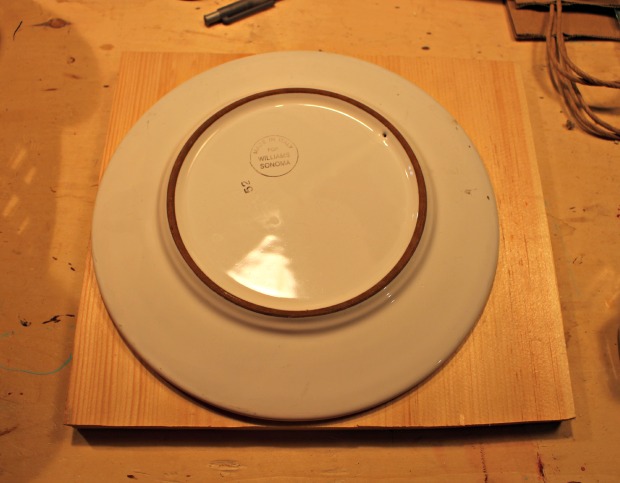
Step 2: Trace both a large circle shape onto the 1×12 and a smaller circle shape onto the 1×8. Then cut out circles using a jigsaw and sand edges well. Spray with clear satin polyurethane before assembly.

Step 3: On the smaller circle draw another even smaller circle (about 4″ in diameter). Make 3 equidistant holes with 7/8″ spade bit drilling only partially down into wood.

Step 4: Cut copper using pipe cutter into 4″ lengths. Cut wood dowel to 4″ lengths and shove inside copper pipe.

Step 5: Place copper & wood sections into pre-drilled holes in smaller wood circle. You can use some glue here. I chose to secure with a finish nail from the bottom as well. Now center the larger wood circle on top and trace the copper pipes with a pencil. Pre-drill holes into the underside of the top larger wood circle and attach the top (use glue if desired).

My copper pipes are very snug in the holes but I did use a little glue to be sure the wood doesn’t come off.

Maybe your next party needs a simple cake stand? Good luck with all your diy projects.

Pin for later!

Awesome! This looks so simple I think even I could do it, lol! It’d be super easy to drape fabric on top to change it up depending on what kind of party it’s being used for.
Another great project, Jaime! I am loving the copper trend right now! I’d recommend sealing the cake stand with Watco butcher block oil – it’s food-safe and brings out that beautiful wood grain. Thanks for sharing! xo