Make Your Own Glitter Necklace
By:
Bobbie Byrd
 I’m a Byrd (pronounced bird) and as most birds, I like sparkly things. Most girls love anything with a bit of a shimmer and shine. That’s why it’s important that we know how to make sparkly things rather than spend a fortune on it! It’s unbelievably easy to make a glitter necklace using Mod Podge.
So today let’s learn how to make this glitter necklace. It’s easy, and will cost only a couple of dollars. (Or if you’re looking for a fancier version, check out this tutorial to make a glitter necklace using resin
.)
First let’s break down the supplies and cost.
I’m a Byrd (pronounced bird) and as most birds, I like sparkly things. Most girls love anything with a bit of a shimmer and shine. That’s why it’s important that we know how to make sparkly things rather than spend a fortune on it! It’s unbelievably easy to make a glitter necklace using Mod Podge.
So today let’s learn how to make this glitter necklace. It’s easy, and will cost only a couple of dollars. (Or if you’re looking for a fancier version, check out this tutorial to make a glitter necklace using resin
.)
First let’s break down the supplies and cost. 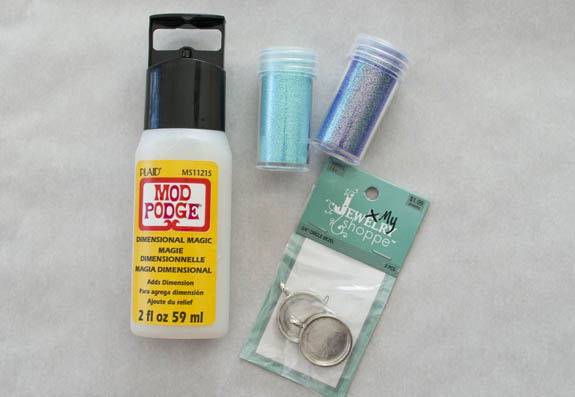
This post contains affiliate links
This is all you will need to make a glitter necklace. In fact, with these supplies you can make two or you can buy more bezels and make a ton of them! You’ll need: Mod Podge Dimensional Magic – $5.00 Round 3/4′ Bezel – 2 for $2.00 at Hobby Lobby Fine Glitter – 6 different colors for $5 at Hobby Lobby All together the price is $12. But the price to make just one only using a portion of these supplies would be under $2. If my kids don’t steal my Mod Podge Dimensional Magic again I can use it along with the 6 tubes of Easter colored glitter to make a lot of crafts this spring. I also still have one bezel left over. This would be a great easy jewelry craft to make with a group of friends, teachers at the end of the year, or for your kids.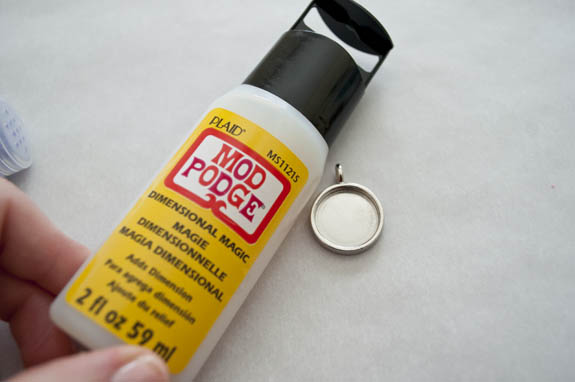 To start you just need the bezel and the Mod Podge Dimensional Magic. You need the Dimensional Magic, not regular Mod Podge, to make this project successfully.
 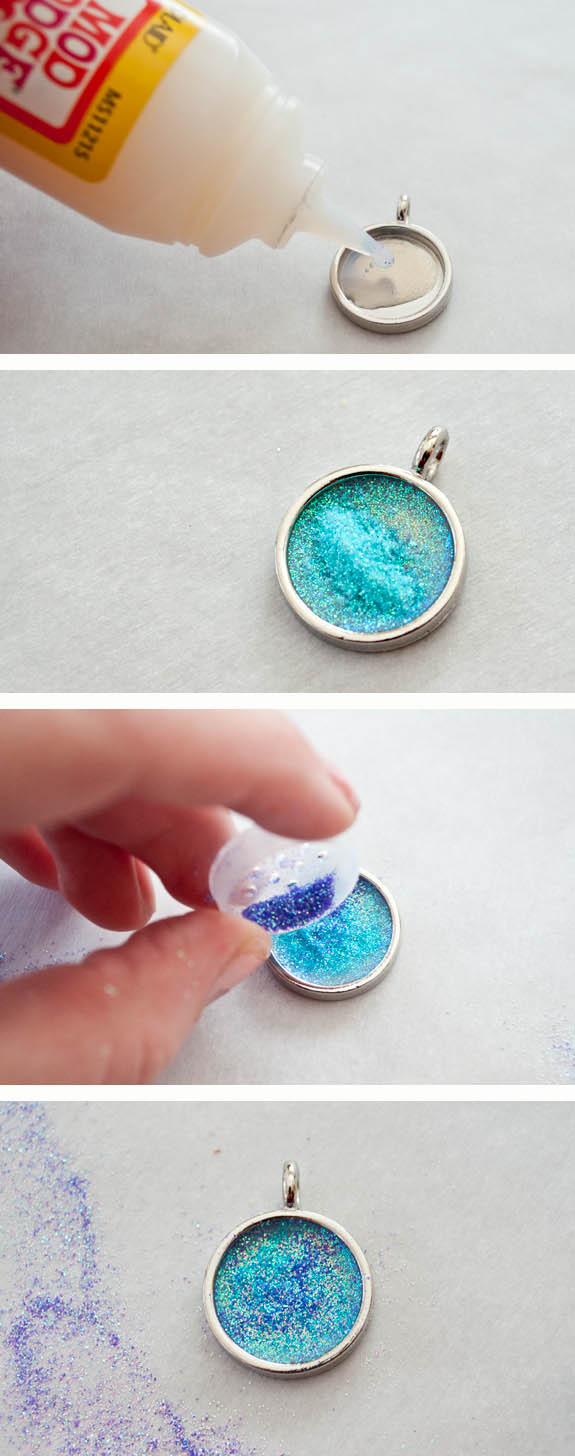 Place a thin layer of Mod Podge Dimensional Magic in the bottom of the bezel. You want it to be less than half full.
Next add a thin layer of glitter. It’s ok if there’s a short mound of glitter in the middle, the Mod Podge will absorb it. Then while it’s still wet add a small amount of glitter that’s a different color.
I just stuck with two colors per necklace. You could try more if you want or try metallic colors for a really pretty necklace.
Now let the first thin layer dry for about 15-20 minutes. Get some snacks or work on a different necklace.
Wait! You’re not done though! You have to finish it!
Place a thin layer of Mod Podge Dimensional Magic in the bottom of the bezel. You want it to be less than half full.
Next add a thin layer of glitter. It’s ok if there’s a short mound of glitter in the middle, the Mod Podge will absorb it. Then while it’s still wet add a small amount of glitter that’s a different color.
I just stuck with two colors per necklace. You could try more if you want or try metallic colors for a really pretty necklace.
Now let the first thin layer dry for about 15-20 minutes. Get some snacks or work on a different necklace.
Wait! You’re not done though! You have to finish it! Now add another layer of Mod Podge Dimensional Magic that comes just under the edge of the bezel.
Repeat the same process with the two tones of glitter.
Now add another layer of Mod Podge Dimensional Magic that comes just under the edge of the bezel.
Repeat the same process with the two tones of glitter.  The bezel doesn’t lay flat so you will have to put something under one end to make the top an even surface. I used the cardboard label from the bezel package and it worked great.
Give it a few minutes to set up and then take a pencil or chopstick and push it down gently through the top layer. Don’t worry – this does not leave a hole. The pencil or chopstick will clear away an area of glitter and help you see the bottom layer. The Dimensional Magic will fill in with a small clear area.
Let the bezel dry completely for 4-5 hours.
Then you’ll be left with a pretty sparkly necklace that your friends won’t believe you made for less than a cup of Starbucks!
The bezel doesn’t lay flat so you will have to put something under one end to make the top an even surface. I used the cardboard label from the bezel package and it worked great.
Give it a few minutes to set up and then take a pencil or chopstick and push it down gently through the top layer. Don’t worry – this does not leave a hole. The pencil or chopstick will clear away an area of glitter and help you see the bottom layer. The Dimensional Magic will fill in with a small clear area.
Let the bezel dry completely for 4-5 hours.
Then you’ll be left with a pretty sparkly necklace that your friends won’t believe you made for less than a cup of Starbucks!  That’s gorgeous but so are these:
 Get the full instructions to make these necklaces using resin
, which are just a few more steps then making the sparkle glitter necklace.
This one is my favorite:
Wel
Get the full instructions to make these necklaces using resin
, which are just a few more steps then making the sparkle glitter necklace.
This one is my favorite:
Wel 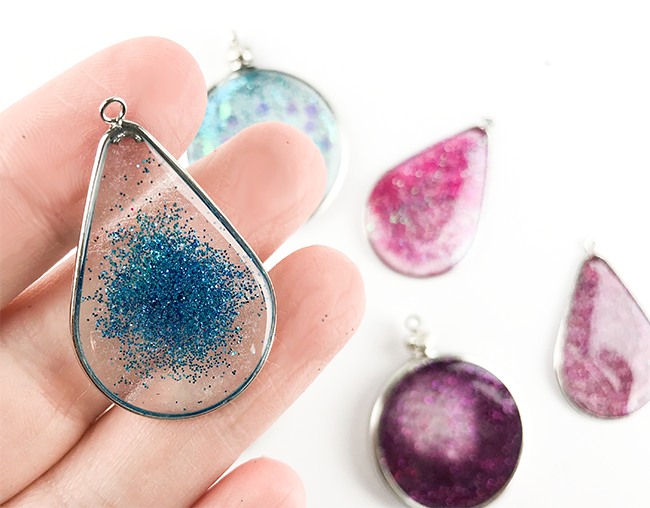 Well, one of the many favorites.
If you want more easy jewelry craft ideas check out my all time favorite jewelry craft; wire wrapped bracelets.
Well, one of the many favorites.
If you want more easy jewelry craft ideas check out my all time favorite jewelry craft; wire wrapped bracelets.
 Or if you’re tired of jewelry, check out the Burlap Sunflower Wreath
:
Or if you’re tired of jewelry, check out the Burlap Sunflower Wreath
: 
The post Make Your Own Glitter Necklace appeared first on Clumsy Crafter .
Labels:
0
COMMENTS