
I like to paint. I always have. Yet the truth is that I have trouble painting because I get frustrated when it doesn’t look realistic. Anyone else? That’s why I’ve fallen in love with the whimsical style of painting. Not only is it pretty simple, I can let colors play while not worrying about how perfect it looks.
The style of whimsical painting I do is basic and can be done in only a few steps. In fact, I stumbled on this years ago through someone a follow on Instagram, Jenni Horne . If you’re creative, do yourself a favor and follow her.
I watched some of her paintings evolve as she showed progress pictures and thought, I can do that. So here we are, awhile later and I have done that – many times now.
I love this style of painting because I love black outlines – always have, always will – and this is an easy way to play around with them.
A few months ago I also showed you how to use this same style painting to paint illustrated characters for kids , mainly the pigeon from Mo Willems books.
Are you ready to learn my process? This is just what I do. You can do it this way too or make up your own rules. Your painting, your rules.
Every single painting starts in the same exact way; me digging through the garage looking for scrap wood . Can you do this on a canvas or paper? Sure but I like the bulk of scrap wood along with finding a use for it. I also like scrap wood because it means the sizing is always going to be different.
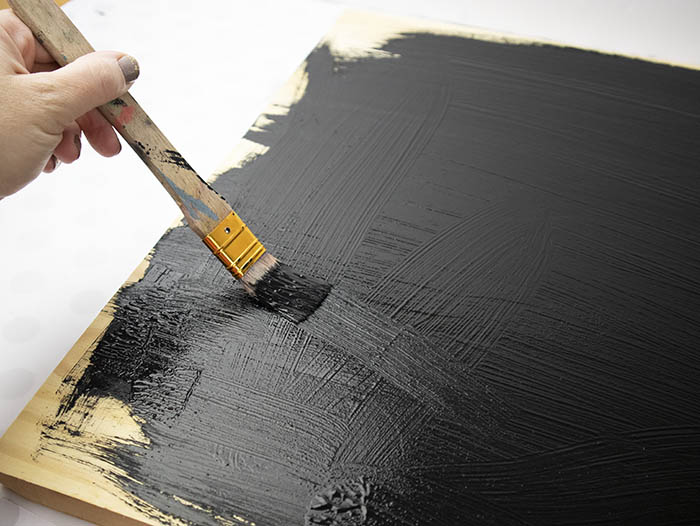
Once I have my scrap piece of wood, I paint it black with a basic black acrylic craft paint. I do not use chalk paint for this step because chalk paint will grip too tightly to the chalk that we want to erase at the end.

Wait? Chalk. Yup. Plain white chalk although I have used other colors when I was out of white.
Once the black paint is dry, it’s time to go crazy with chalk.

Using chalk, outline your entire painting. If you mess up with an area, don’t worry about it. You can paint over any chalk lines that you didn’t want in that space.
When using the chalk, remember that anywhere the chalk is will be black when your painting is finished.

Once the chalk is done, you can start painting.
I try to mix similar colors. Instead of painting a rose all pink, do a petal that’s red, one that’s pink and red mixed and one with pink and coral. Just go wild with color.
Here’s the thing that matters – if you don’t like it, you just paint over it.

Sometimes I like the paint to be really thin so you can see through it. On the background with this painting, I used a large stencil brush to rub the gray into the wood and smooth it out.
Play around. You can do textures, layers of paint, or add colors you didn’t expect in different areas.
If you’re not having fun, you’re doing it wrong.
Once everything is painting, you’ll be left with something such as this, where you can still see the chalk.

Now’s the magical part. Take a Q-tip, dipped in a little water, and gently remove the chalk.

As the water dries, you’ll see some chalk reappear. Go over it lightly once more and the stop worrying about it. Some of it might remain a little and add character. If it bugs you, put a small amount of black paint on a small brush and go over the area with paint
To finish this project, cover with 1-2 coats of Mod Podge to seal it. You can use other sealers as well, I just like how it looks when I mix matte and gloss Mod Podge.
The Mod Podge will also cover any chalk that didn’t erase and leave a nice looking surface.
And then, you’ll have something like this:
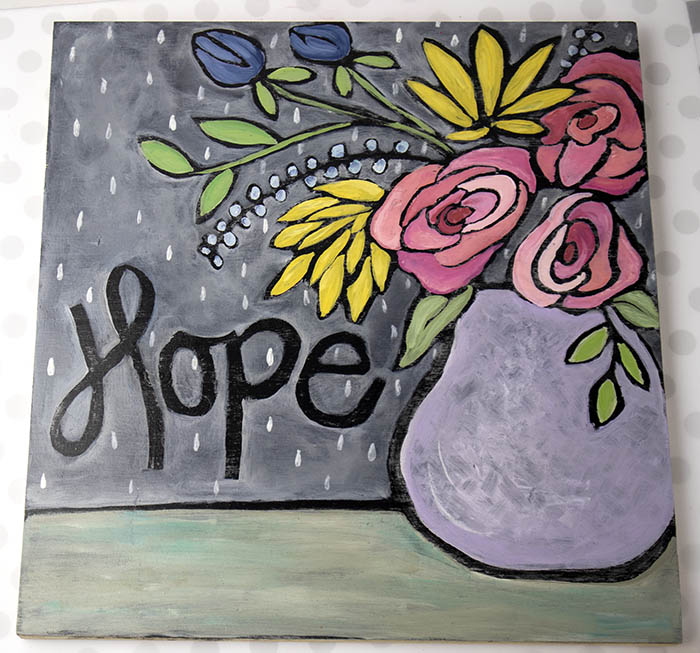
I still need to make a simple wooden frame for it. A friend asked if she could buy it but I think this one is staying here with me.
What do you think? Is this a technique that you’d try?
This would be a great project to make with other women at a crafting group or ladies night out.
Tag a friend that you want to get together and have a crafter’s night out with or share this to their FB wall.
The post Easy and Fun Whimsical Paintings – You Can Do This! appeared first on Clumsy Crafter .
[…] is an oil, food dye is not so the two will not mix. This is actually considered a resist, like the easy style of painting that I’ve shown you how to […]
[…] Simple Paintings Anyone Can Make – Perfect for adults and group gatherings […]
In reply to Felicia .
The word remains simply because the background is already black before you use the chalk. Carefully paint up to the edge of the chalk. Then when you erase the chalk, the black will form the word. You can practice before hand to make sure you understand the method and then paint over it with black.
I love how you did this. Thank you so much. When you wrote your word and erased the chalk later, how did it remain. Going to look again. ❤️