Pinata Hearts – DIY Candy Treat Boxes
By:
Bobbie Byrd
 Valentine’s Day is right around the corner. I don’t know about you but Valentine’s Day crafts are some of my favorite things. Maybe it’s the pinks and the reds or the hearts and the dots but I love to make crafts for Valentine’s Day.
That’s why when I was doing one of my favorite pasttimes, wandering the aisles of Hobby Lobby, I came up with this idea for a cute treat box to give away as a valentine, with a little bit of a Pinata twist. Everyone loves pinatas. You get to take out your aggressions and be rewarded with candy, what’s not to love about that?
Valentine’s Day is right around the corner. I don’t know about you but Valentine’s Day crafts are some of my favorite things. Maybe it’s the pinks and the reds or the hearts and the dots but I love to make crafts for Valentine’s Day.
That’s why when I was doing one of my favorite pasttimes, wandering the aisles of Hobby Lobby, I came up with this idea for a cute treat box to give away as a valentine, with a little bit of a Pinata twist. Everyone loves pinatas. You get to take out your aggressions and be rewarded with candy, what’s not to love about that? This post contains affiliate links.
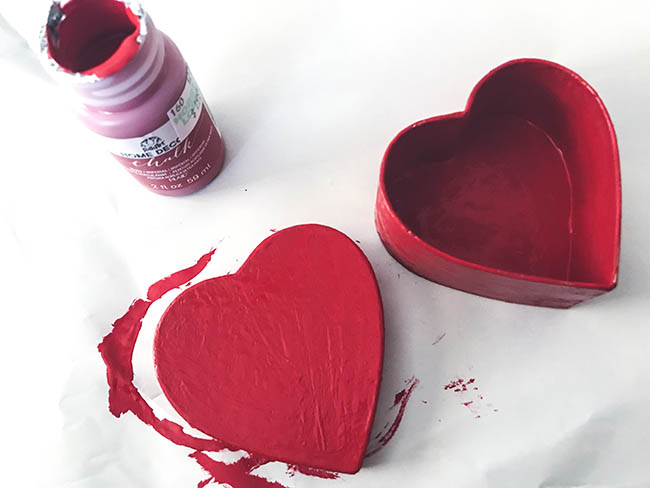
These are simple to make. I used fringe tape which I found at Hobby Lobby or you can order from Amazon here . All you will need is the fringe tape, a paper mache heart shaped box , red paint, paint brush, glue, and scissors. Simple – and fun. Win-win. First all you need to do is simply paint your heart. The first one I made I did not paint it but in a few places the box shows through the fringe so it just looked better on the second box, when I painted it first.
 Once your heart is dry, you’re going to start applying the fringe tape. Here’s the part that will blow you away. The fringe has actual tape on the top part so all you do is stick it to the heart.
 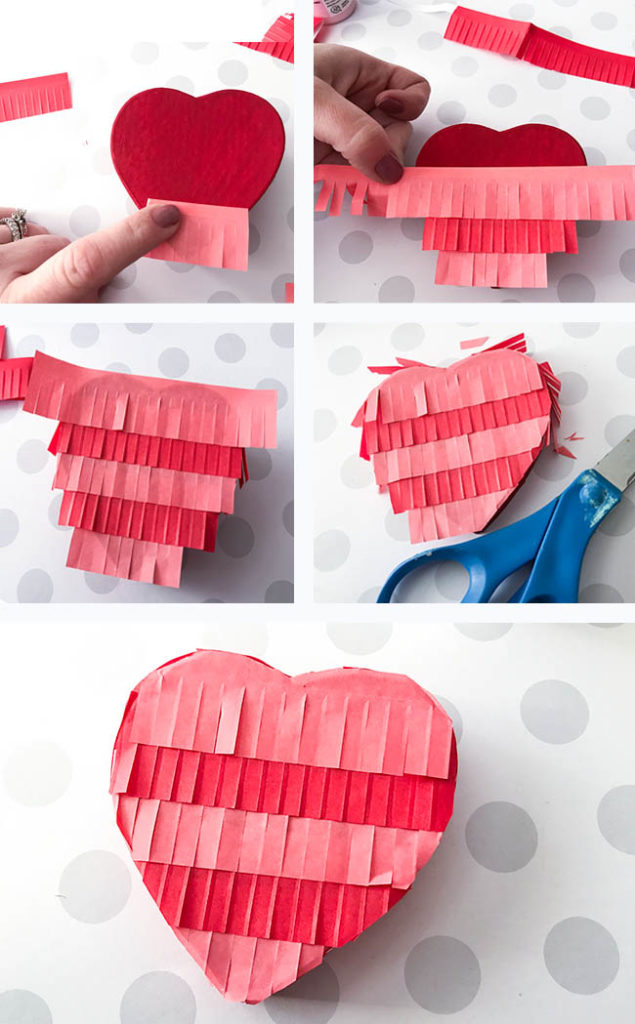 All you need to do is stick it in rows all the way to the top of the heart. It will look a little crazy but no worries, we’ll fix it. Once you have the top of your heart box covered, take a pair of scissors and simply trim around the edges.
 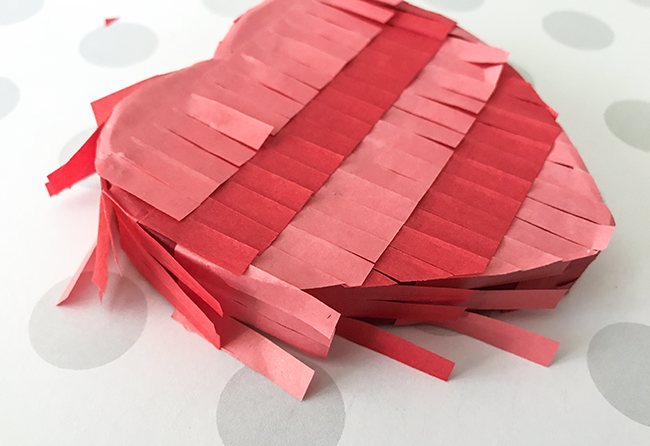 Once the top is done, you need to cover the side of the lid. Cut smaller sections of fringe. The box I was using took about 3 rectangles of the fringe for each piece and then go around the sides, covering it and trying to line it up with the colors on the top.
  The parts of the box lid that turn will make the fringe stick out some. I simple put a small amount of glue on a paint brush and lightly brushed under the fridge and then pressed it down. You don’t want to saturate it with glue so it stays down all the way, just go light and play with it until it looks alright.
  Once your top is done, you’ll need to do the bottom part of the box. This is the easiest part. I used two longer strips of fringe and lined them up so they fit perfectly. I didn’t have to trim or glue anything.
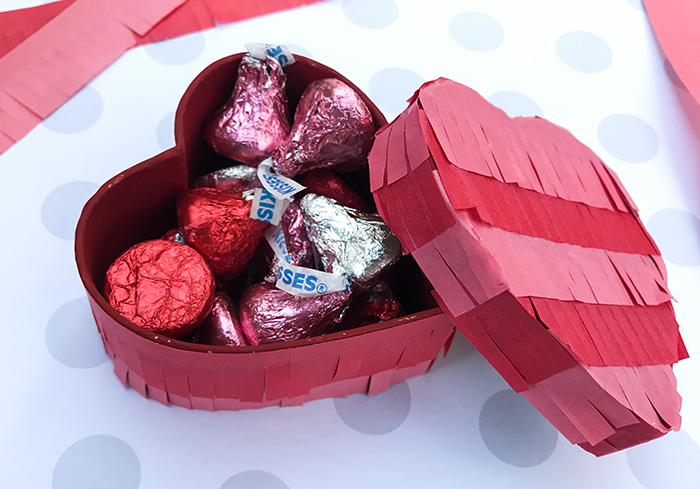
Now your box is done and ready to be filled with treats. Fill it up with yummy chocolates and then
Once your top is done, you’ll need to do the bottom part of the box. This is the easiest part. I used two longer strips of fringe and lined them up so they fit perfectly. I didn’t have to trim or glue anything.
Now your box is done and ready to be filled with treats. Fill it up with yummy chocolates and then 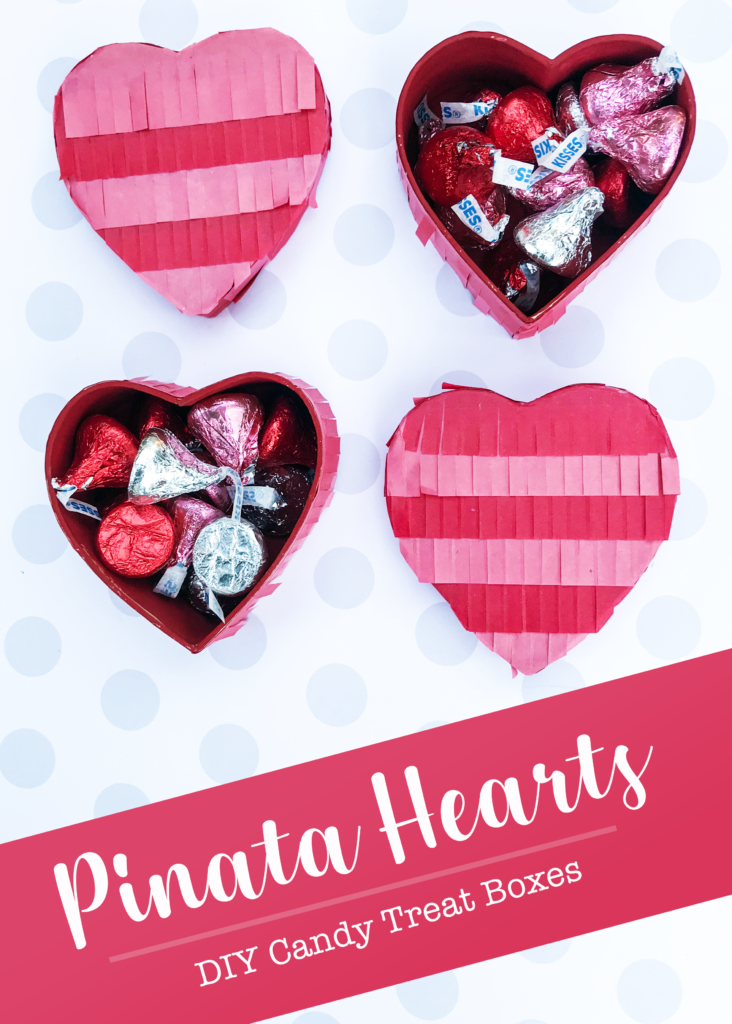
The post Pinata Hearts – DIY Candy Treat Boxes appeared first on Clumsy Crafter .
Labels:
[…] showed you the DIY Heart Treat boxes last week and this week I have a framed shadowbox idea to share with you but for now, let’s […]