
When my girls were little, I made peg dolls a lot. They’re great to make for kids because they’re very sturdy and the smaller size means that they’re perfect to throw in your purse or keep in the car console for those times that you just need a child to be entertained for a bit. DIY hand painted peg dolls are simple and really fun to make.
In fact, I made these for a little girl who I hung out with this weekend at a swim meet. She needs something that she can play while waiting for her older sister to swim but it won’t break the bank if they get lost, muddy or dropped in the pool.
The truth though is that I was wishy washy on sharing these with you. I hadn’t made peg dolls in so long that their outfits looked a little sloppy, then there’s the blue doll with the gigantic eyes and I’m not going to show you the one that a child added a huge black nose to while I wasn’t looking. But I need to get past that because a small child isn’t going to care.
If you make these for your kids, grandkids, or a friend’s kids, they’re not going to complain about your color selection not matching up or mis-sized polka dots. They’re going to love what you made for them because you made it.
So let’s throw perfection to the curb, along with the laundry piles currently chilling on our couches , and make some peg dolls.
How to Make Peg Dolls

Let’s talk about the doll.
Nowadays you can find a wide variety of peg doll shapes and sizes at hobby stores. Even though I’m deeply in love with Michaels, and I take my Instagram friends shopping there often , I prefer to buy wood craft products at Hobby Lobby. I think the selection there is wider and the prices are better.
I usually buy the peg dolls in the picture above. It’s just the style I prefer. However if you’re buying these to make for toddlers, just remember that anything that can fit inside of a cardboard tube is a choking hazard. Therefore, you need to buy the big ones for toddlers.
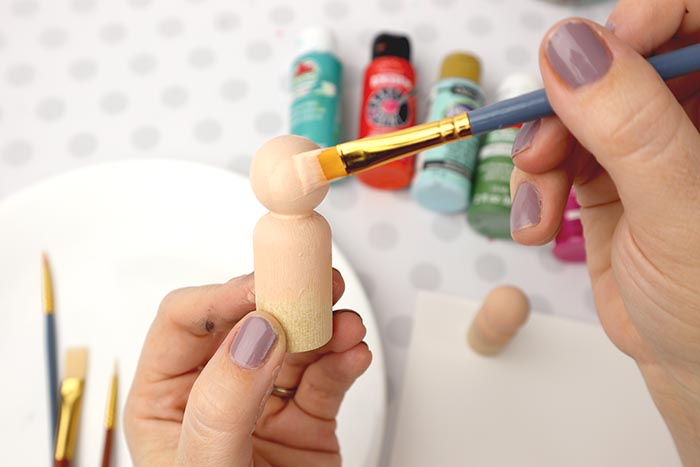
Step one is easy but optional. You can paint the top half of your doll whichever skin color you want or you can leave it as plain wood, that’s up to you. I paint it. I’m not sure why, I just do.
It just needs one coat of paint and by the time you’re finished painted your other dolls, the first one should be ready to add hair.
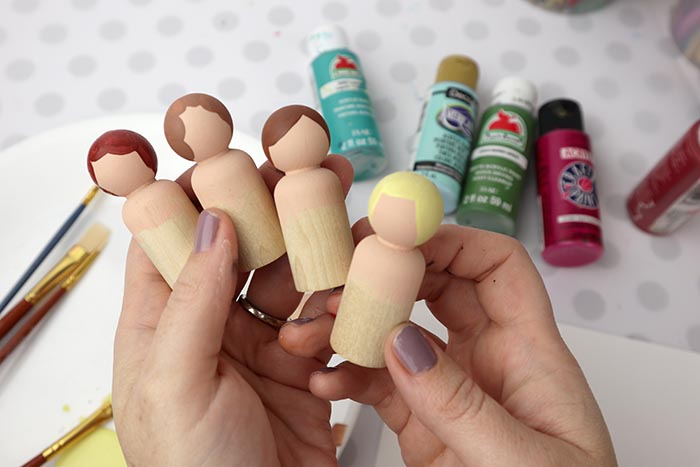
I did a variety of hair colors and styles. The tip when making hair on peg dolls it to decide where you want the face and then frame it with a style. Using a small flat paintbrush you can easily make bangs or swoops to represent curls. After I paint the front of the hair, I simply paint the back of the head in the same color. Don’t worry about details on this step.

Next we’re going to add clothes. Add a neckline right under where your peg doll’s face will be and then paint the rest of the doll the same color.
Now we’re going to add some details. One trick I figured out a long time ago is that dots and simple lines can really make a peg doll outfit pop. If you’re doing this for the first time, don’t try to get really detailed. Just add a collar to the neckline, maybe some pockets or buttons and call it done.

The best tip I can tell you for painting peg dolls is to use the end of the paint brush to make dots.
Once you have their outfits done with cute details, you’re going to add cheeks using pink dots and then eyes using black dots.
Practice on a piece of paper getting similar sized dots by barely pressing the wrong end of the brush into the paint and then where you want the dot to be placed.

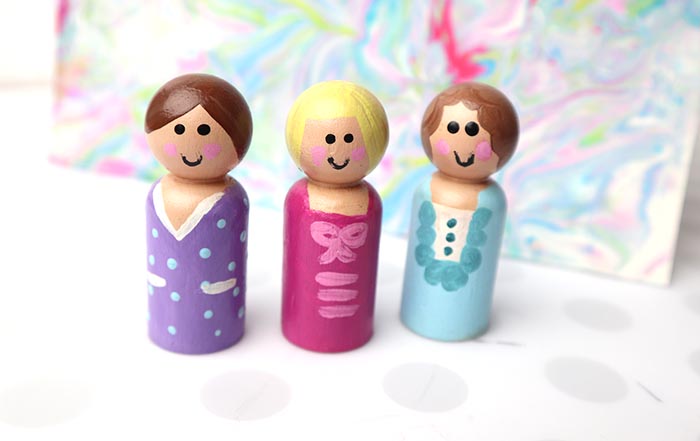
When you’re ready, add the eyes and cheeks to your doll. The purple doll also got blue polka dots added to her dress.
Dots will save the world, just wait and see.
Once you have your cheeks and eyes, using the smallest paint brush you have, add a simple half moon smile and you’re done painting.
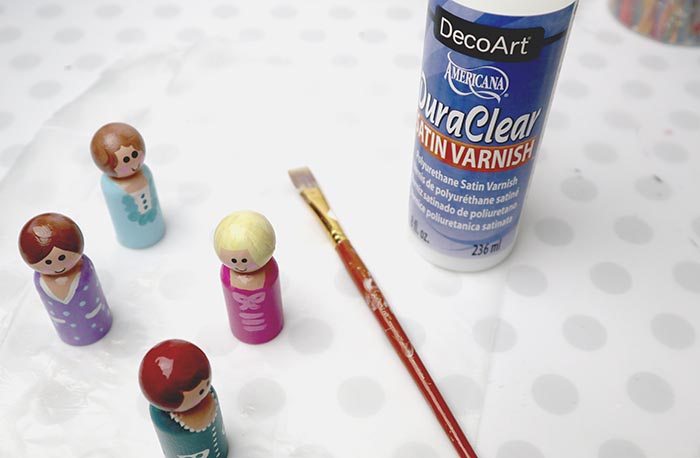
The final step when making peg dolls is simply to seal the dolls. It adds a bit of shine and keeps the paint you so carefully applied nice and safe.
In the past I’ve used Triple Thick to seal the dolls and I loved it. It gave the dolls a really nice shine and helped them last for years.
However this time my craft store was out of Triple Thick so I decided to give DuraClear Satin Varnish a try and I love how fast it dried. This product was very easy to use and it looks great.
Now these peg dolls are ready for the swim meet this weekend and entertaining my sweet little friend.
What do you think? Are you ready to try your hand at making peg dolls?
Save this idea to make later by saving it to Pinterest.

The post How to Paint Peg Dolls – Simple Craft to Entertain Kids appeared first on Clumsy Crafter .
Hello! Thank you for sharing all of this info. You mention the size for toddlers and the choking hazard- but is this something to wait to hand them until they are no longer putting things in their mouth? I know the final steps is to seal the design but I’m guessing that wouldn’t be effective when repeatedly covered in saliva?? I see lots of pictures of little ones playing with these on websites that sell pricey versions of peg dolls. I’m just hesitant when they are homemade. I’d appreciate your advice. Thank you!