Freezer Paper Stencils
By:
Bobbie Byrd
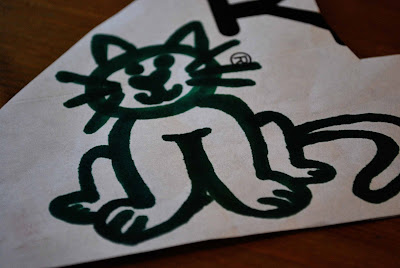
Step 2: I decided to make Princess Girly Girl a kitty cat for her tshirt. This one was a little tricky because I wanted the lines be the painted areas. I’m used to cutting on lines like we learned in elementary school so I kept cutting straight through the white parts that I needed intact in order to get to the lines. I had to redraw this cat a few times before I was able to cut it out correctly. If this is your first project, just choose a large shape such as the dinosaur on Princess Goofy’s shirt. That will be easier to cut out and get the hang of.
Step 3: Iron the freezer paper directly onto the tshirt. It will stick to the shirt. Place a piece of cardboard or cardstock inside the tshirt to keep the paint from bleeding through once you start painting.
Step 4: Now you’re ready to start painting! Do three light coats of paint, letting each one dry for awhile in between.
On a random note, this was the cleanest project that I have ever completed in my life! Look at that paint! Not a drop of it got on the table or any other surface. I was so proud.
Step 5: Let the shirt dry overnight and then peel off the freezer paper. Toss in the dryer for a bit to heat set the paint and then wash and wear as normal. If you are one of those freaks that likes to iron everything, do not iron directly onto the paint. Turn the shirt inside out before ironing.
The girls loved their shirts and the dinosaur shirt was the perfect shirt for Princess Goofy to wear when we took her to the science museum to see the dinosaur fossils.
Edited to add: You might notice that this is an old post originally posted in 2009! Look how small Princess Newbie was. However I found it and wanted to share it with you because it really works! That green dinosaur shirt that I made for Princess Goofy withstood her wearing it until it no long covered her belly and now Princess Newbie is wearing it three years later. This is a great technique to make personalized tshirt or bags for kids with their name and hobby that might not fit the gender specific market. I hope you enjoy it as much as I enjoy looking at these old pictures.
The post Freezer Paper Stencils appeared first on Clumsy Crafter .


[…] I sewed the tool belt using some black duck cloth but if you’re not a sewer than you’re still in luck! You can buy any dark colored tool belt and add the decorations using freezer paper stencils. […]
jeannie jeannie DIY freezer paper stencils. Thinking of making the kiddos drawings into a stencil then putting it on a t-shirt for Fathers Day.
In reply to Jane .
Yes! We need to do it again since they have outgrown those shirts.
Wow, came out great!