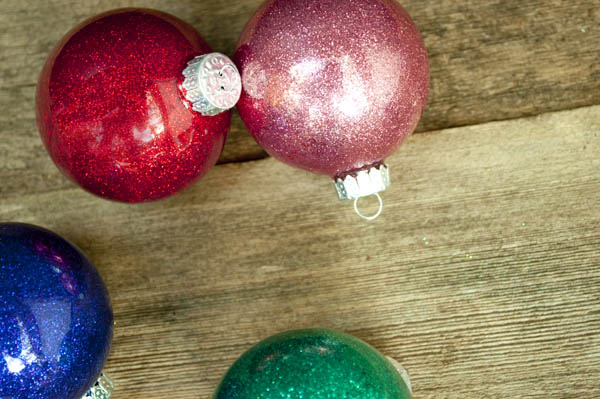
Glitter ornaments are so extremely simple but they look they took hours to make. Without a doubt, glitter ornaments are some of the easiest handmade ornaments but there are a few different ways to make them. You can also go the extra step of adding vinyl to personalize the ornament.
I tried out two different ways to make glitter ornaments and today I’m going to share my findings with you. Which will produce a better ornament? Polycrylic or floor polish?
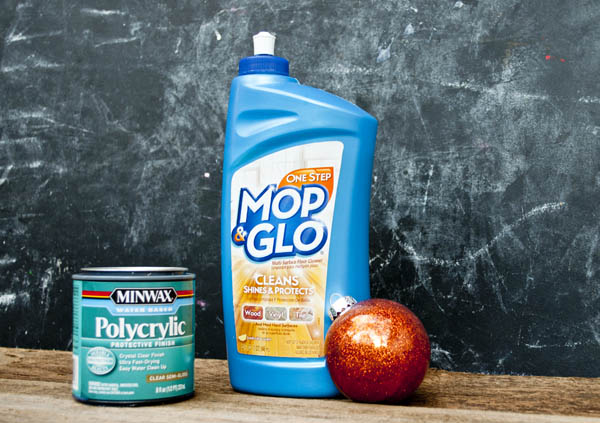
Many people use a floor cleaner or wax, such as Mop & Glo, to make the glitter ornaments while others use polycrylic.
I tried out both ways and here’s what I have decided:
Mop & Glo or floor polish:
- Easiest way to make them. The liquid is thin and much easier to work with.
- Quickest method. There’s no waiting time.
- Less Coverage. The entire surface of the ornament will be covered but you’re more likely to have thin areas of coverage.
- Less Glitter. This method uses less glitter but it comes with less coverage.
- Less Shine.
- Doesn’t always hold permanently. Some people have reported that the glitter will eventually let go of the glass ornament. I haven’t experienced it but it’s worth noting.
Polycrylic:
- A little bit harder to get perfect but still easy.
- Requires more time as the polycrylic takes more time to set up.
- Permanent hold.
- Amazing coverage. You won’t see any light spots of glitter with this method.
- Shinier with bolder colors, even when using the same color of glitter.
I weighed the pros and cons of each method and in the end, using polycrylic to make the glitter ornaments won out based on the coverage and shine. If I’m going to use glitter, I want it to shine like the top of the Empire State Building and you definitely get that with polycrylic.
I would say that I want an ornament that will last but since we’re on our third broken ornament of the season, that’s not likely.

To make this glitter ornament using polycrylic you simply need a clear ornament, polycrylic and fine glitter.
You can find polycrylic at any home improvement store for about $9 for a small can. I’ve made about 10 ornaments now with polycrylic and I haven’t even put a dent into the can. You can make a lot of ornaments with this one can or use it for other projects.

Simply pour a small amount into the ornament and swirl it around to coat all of the sides.
Here’s where the difference between using polycrylic and floor polish sets in when it comes to time. If you use floor polish the extra liquid easily pours out and you are ready to add the glitter immediately.
Polycrylic is thicker and takes a little more time to get all the sides well coated. Then you have to let all of the extra drip out.

Once you have all the visible excess out of the ornament, turn the glass ball upside down on paper or aluminum foil and leave it alone for a minute or so. You’ll be surprised how much more comes out.
If you’re using floor polish than you can skip this step.
If you don’t get all of the excess out with the polycrylic than your glitter will drip down the inside of the ball with the wet polycrylic and you won’t have even coverage.
This post contains affiliate links.

Once it’s evenly coated on the inside and there are no visible drips you can add your glitter.

This is one of the best parts. There are so many colors of fine glitter than you can choose from now. You don’t have to worry about not finding the colors that you want for your Christmas tree anymore!
I used this set of fine glitter from Martha Stewart .

Pour some glitter inside your ornament and rotate it to cover all the sides. I lightly tap it against the palm of my hand to make sure that any loose glitter will find a spot to adhere.
Keep turning and rotating it until you can’t see any spots without glitter. Add more glitter to the inside of the glass ball if you need to.

It’s so quick and so pretty when it’s finished.
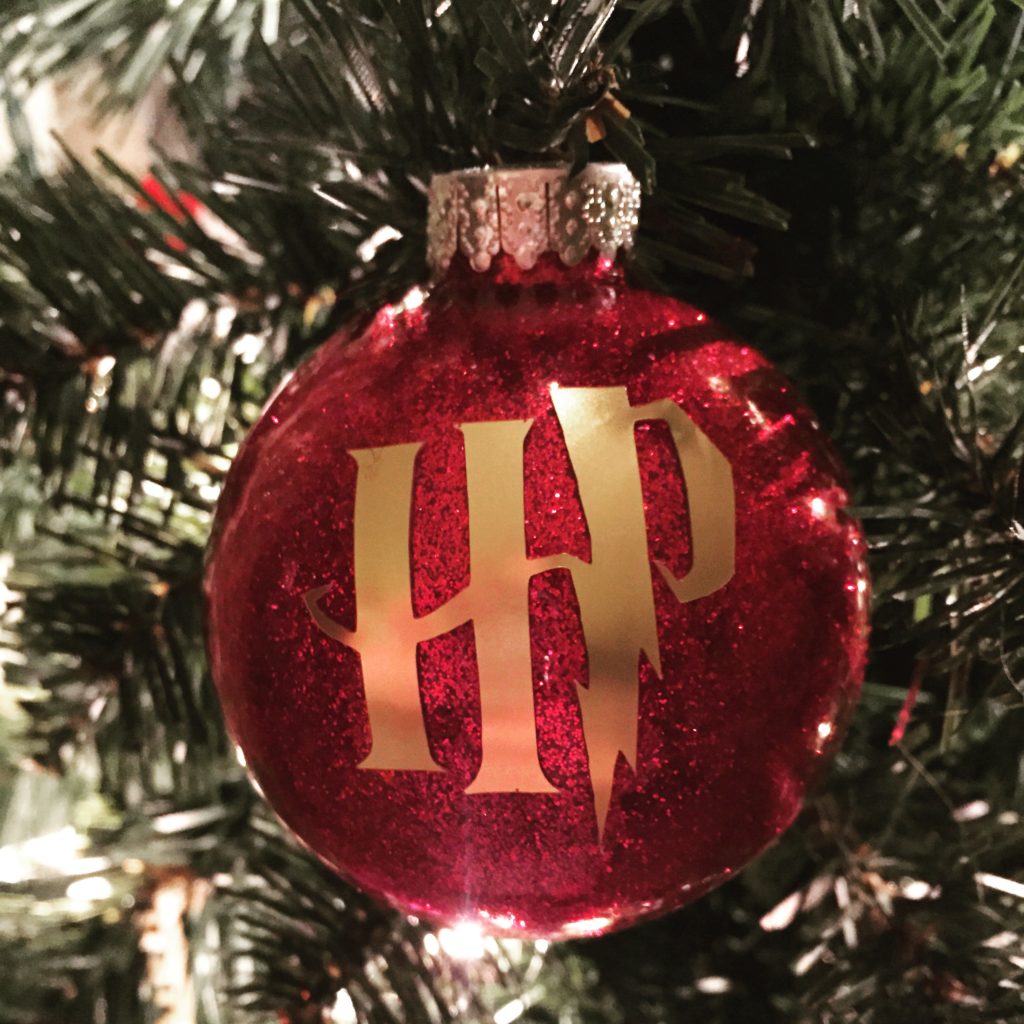
Carefully add the top of the ornament and it’s ready to hang. Or if you want to make it really special you can add vinyl decorations to personalize the ornament such as this Harry Potter ornament that I made my husband for the geek Christmas tree in his man cave. They HP ornaments go well with our cinnamon dough Star Wars ornaments .
The polycrylic to me just looks better but it is hard to see the difference in pictures. If you’re wanting to do this craft with a group of friends or at a Christmas party, I would use the floor polish for ease and timing. However, if you want an ornament that is going to be a family heirloom or that will stand out with its bold colors, I recommend using polycrylic like I did when I made these amazing Mermaid glitter Christmas ornaments .

Hopefully, now you’ll be able to make some amazing looking Christmas ornaments that you will love.
If you liked this post, I bet you’ll love this cute Diorama Style Christmas Ornament Tutorial.
Want more projects like these two? Follow me on Instagram , Pinterest or Facebook !
The post DIY Glitter Ornaments – What Should You Use To Make Them – Polycrylic or Floor Polish? appeared first on Clumsy Crafter .
In reply to Sarah .
I was gonna ask that when I put the top on it scratched the inside on top
In reply to Samantha Edwards .
When applying any vinyl onto glass or plastic I use a spray bottle with water and two or three drops of dawn dish soap.
Tape the top of the decal onto the surface using painters masking tape, to be sure it stays centered. Spray Floating liquid onto the plastic/glass. Remove the backing on the sticker, smooth the bubbles out with your fingers slowly and methodically. Since the bubbles are water now not air, they come out much easier.
I’m sure there should be YouTube videos of how to apply decals to vehicles. This is the way body shops do this ….I have done it hundreds of times. I call it floating it on and no it doesn’t hurt the adhesive on the sticker. Don’t do this on paper stickers. This is for good quality indoor or outdoor vinyl decals. I use Oracal vinyl with sure cuts a lot (scal) program on a us cutter to be able to do large projects but circuits or silhouettes make great decals too
Has anyone tried adding food coloring to the polycrylic? I am trying to tint some glass bottles and the mod pog method is not working for me. Seems like polycrylic might be easier, but as much as I search , I am not finding anyone who has used this method.
On the poly tulip glitter ornaments…have you tried to adhere a photo on the inside of ornament? Wondering whst the process would be? Have done this with pledge only to have photo fall down into ornament later.