
You know you’ve seen those knotty pine dressers from yesteryear. Their spotlight has faded and they are finding themselves at thrift shops, ReStores or worse yet…at the curb.
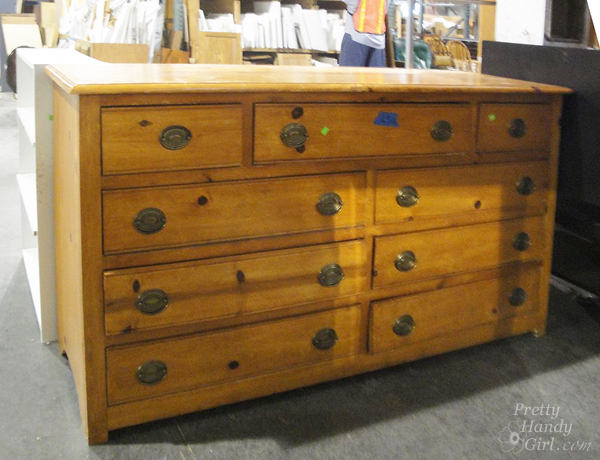
I’m begging you to let this knotty eyesore back into your home. It doesn’t have to be banished. It’s KNOT her fault she was built from cheap pine. All this dresser needs is a new coat of paint and some beautiful brass knobs and all her flaws and knots will be forgotten.
Extra observant points to anyone who realized that this blogger forgot to take a good before picture! She looked very similar to the knotty pine dresser shown above, except she had wooden circle knobs and an unfortunate set of bun feet. I did remove the bun feet from the dresser when I first brought it home. Mama ain’t got no need for buns in this oven (or on my dresser.)
Here are the details on how to refinish a knotty pine dresser and give it a complete makeover!
Materials:
- Sandpaper
- BIN primer
- Damp rag
- Paint brush
- Foam paint roller
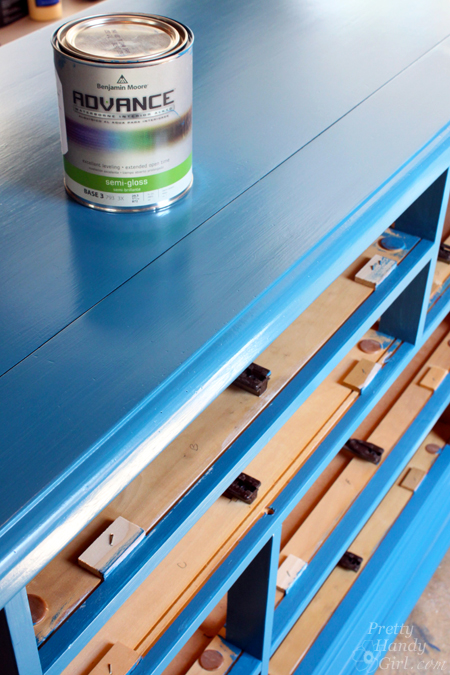
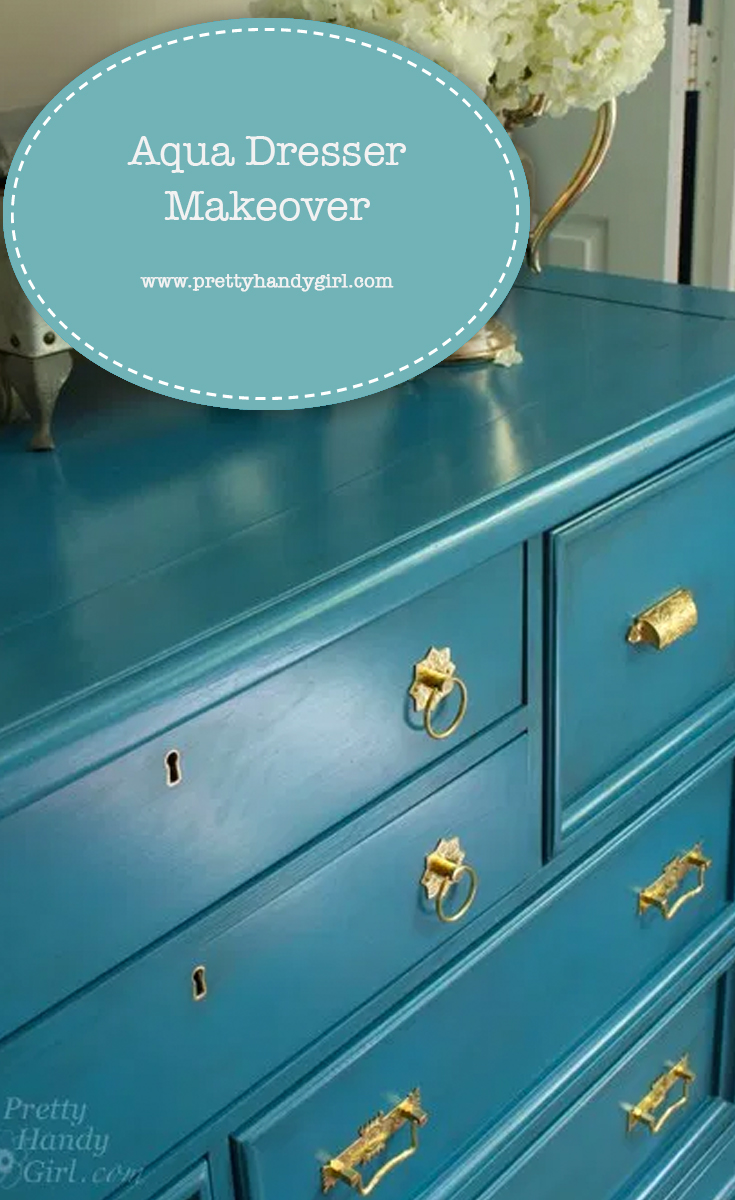
- Quart of Benjamin Moore Advance paint (Deep Ocean)
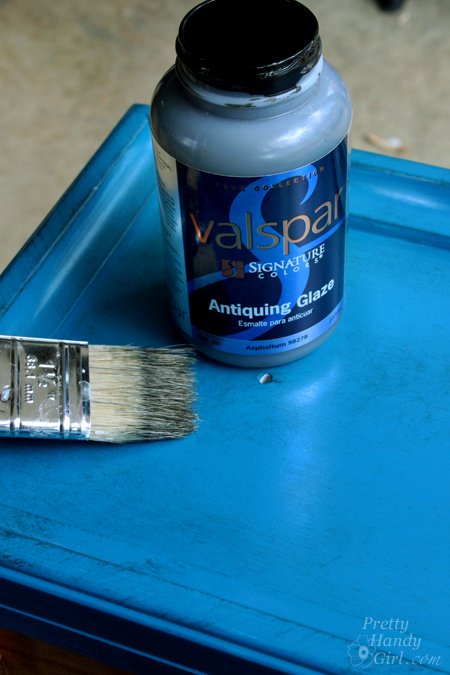
- Valspar asphaltum glaze
- Brass hardware (I bought mine from House of Antique Hardware )
- Drill with bits
- Screwdriver
- Level
Instructions:
This tutorial will be fairly brief, if you need more photos and explanation, you can view my previous dresser painting adventure .
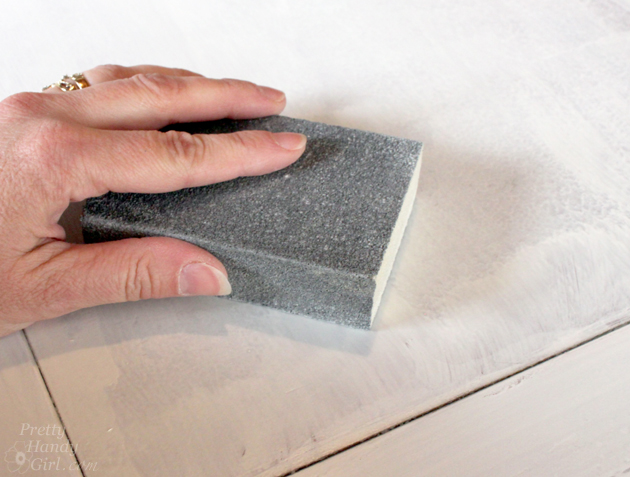
Begin by removing all the drawers and knobs. Lightly sand the dresser and drawer fronts. Wipe off any sanding dust.
Pull out the BIN primer and use it in a well ventilated area. I will stress that you need to use either BIN primer or a shellac-based primer to seal the knots in your dresser. Regular water-based primer won’t properly seal them and you’ll see stains appearing in a few months.
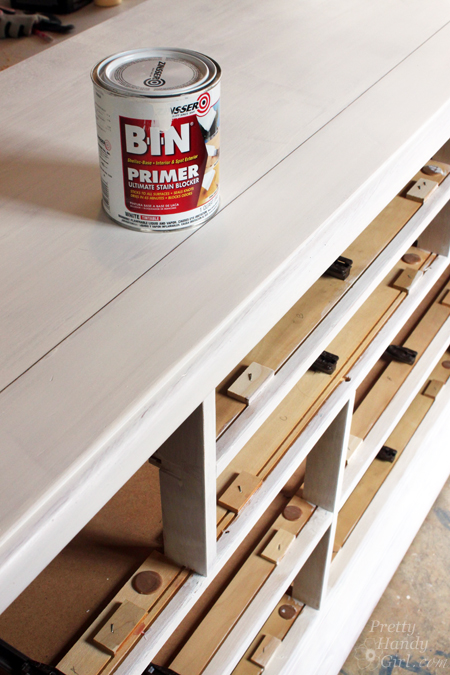
Apply the primer and allow it to thoroughly dry. Lightly sand any brush marks and imperfections off. Wipe off the sanding dust with a damp rag.
Paint the dresser using a foam roller for a smoother finish. Allow the first coat to dry, lightly sand and add a second coat. I chose to use the Benjamin Moore Advance paint for this project. Advance has a hardener in it that prevents chipping. It allows me to skip the polyurethane top coat. Therefore, it is my preferred paint for furniture painting. (I was not paid to say this, I just love the paint.)
For more depth and interest, dry brush and then wipe off the Valspar Asphalum glaze. ( Read my tips and tricks for getting great results with the Valspar Antiquing glaze .)
Let the glaze dry.
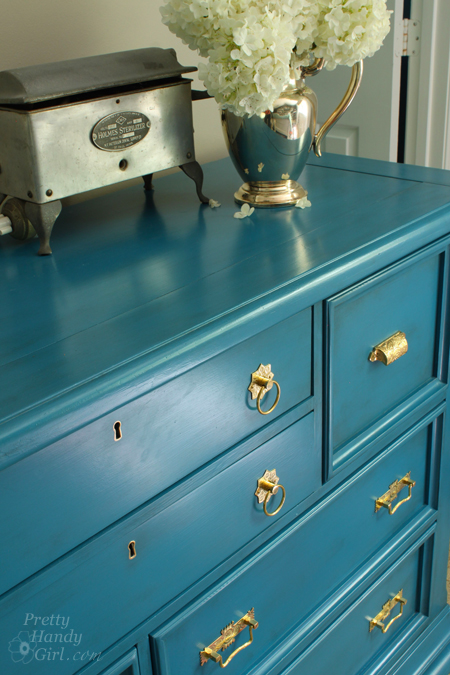
Time to add that final bling and give this lady a new lease on life!

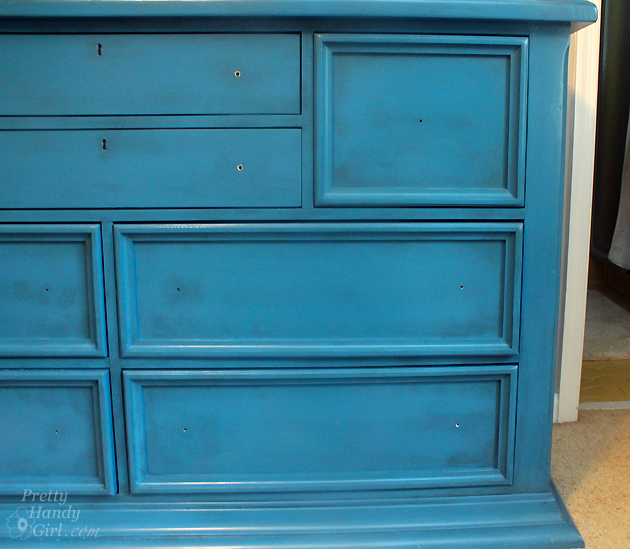
I purchased brass bin pulls to replace the previous single knob. No need to putty the old hole, simply position the pull over the hole and screwed it in place. Out of sight, out of mind!
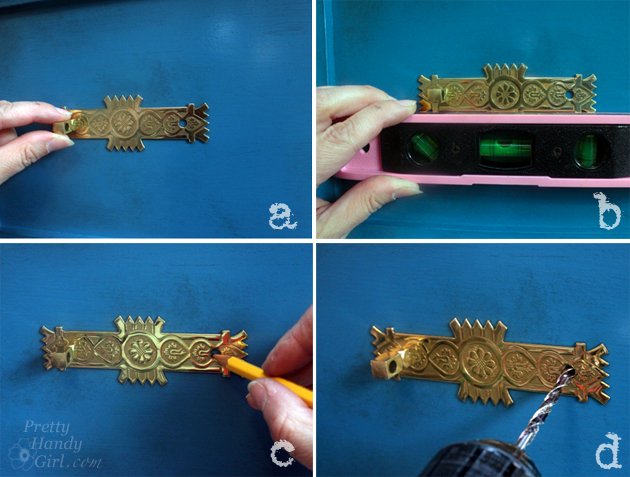
To install new bail pull handles on the other drawers, (a) insert one post into the existing hole. (b) Level the back plate. (c) Mark the second hole. (d) Drill the second hole and insert the second post.
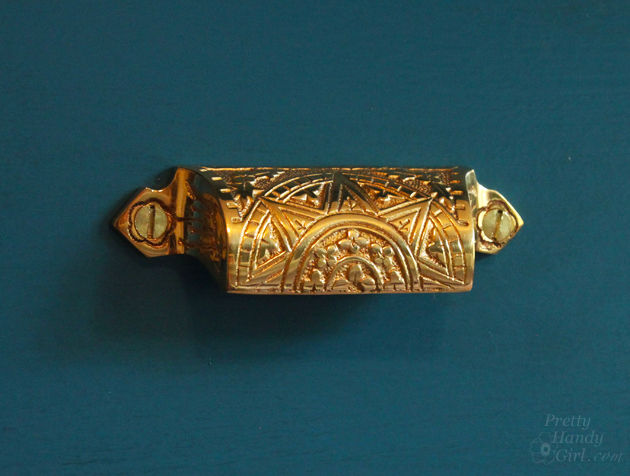
I used three different pulls on the dresser, but they all coordinate beautifully!
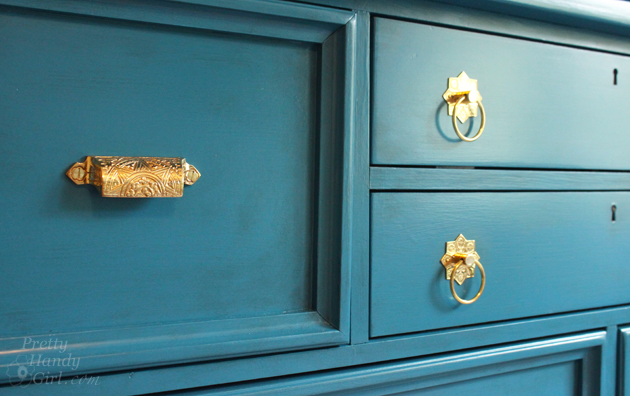
Hardware Source: Bail Pull Handles , Star Ring Pulls , and Bin Pulls
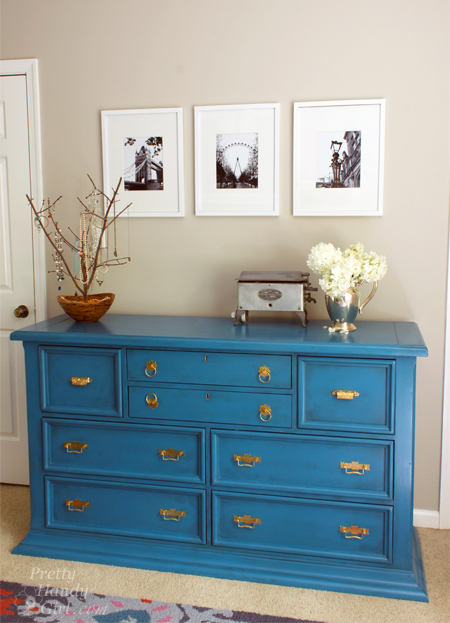
Be honest, would you know that this used to be a knotty pine monstrosity?

She’s one elegant lady now.

I hung a few photos from our trip to England last year. It’s such a nice way to relive the memories.
That’s all folks! Have a great weekend, and stay tuned for more master bedroom progress!
![]()
Pin for later!
Stunning color! I have a solid cherry chest of drawers, bureau, nightstand, and mirror that a previous owner covered in 1970s “antique” paint. One day I’ll get it stripped!
[…] This dresser needed more than a coat of paint to give it an attractive new look. I added black glaze for pretty gray tones. […]
[…] bedroom: build king sized bed paint ombré effect on master bedroom walls paint knotty pine dresser paint vanity create button pendant light add legs to […]
[…] and the dresser. […]
Beautiful transformation Brittany… you are SO talented! Love the color and hardware.
[…] found some furniture painting tips/ideas over on Pretty Handy Girl. You can keep up with my inspiration pins for her room on the Pinterest board I created […]
[…] found some furniture painting tips/ideas over on Pretty Handy Girl. You can keep up with my inspiration pins for her room on the Pinterest board I created […]
Just beautiful! !! In my recent learning how to refurbish furniture, it’s always recommended me to use chalk paint;which I want out to buy tons of. I’ve done a few pieces that I’ve been really happy with but some , not so much. Lol what do you recommend and where could I get some training besides youtube? It’s just youtube, gives sooo many different do’s & don’t’s and at times contradicting each other so for someone like myself (self learner by trial & error), makes it a bit frustrating and I wanna enjoy what I’m doing not get discouraged. Ok…Help! Lol
Didn’t think I would like it but love it. Great “new” piece of furniture.
[…] the quest to makeover our master bedroom and save money, I’ve been painting several pieces of furniture to coordinate with the new bed I […]