
With more of us working from home and needing to create a space to work, this folding laptop and writing table is just the thing you need to make any room into an office!

Folding Laptop and Writing Table Tutorial
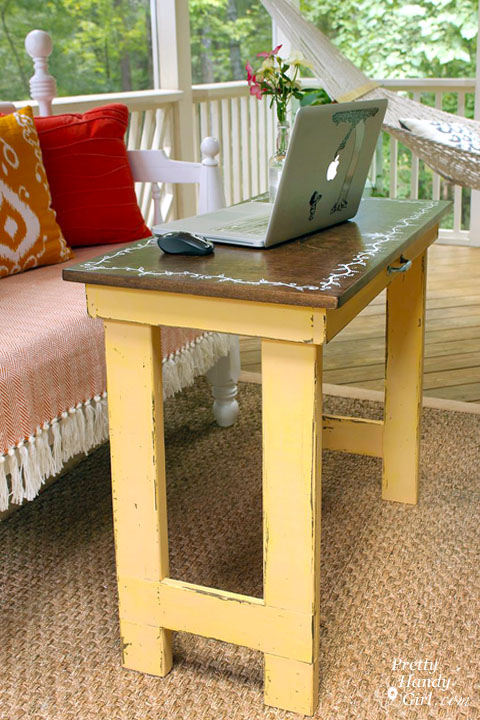
My favorite place to write my tutorials is outside on our screen porch when the weather is pleasant. I love listening to the birds and feeling the breeze blow through the screens. Up until this weekend, I was using an old card table as a desk. But, it was large, awkward, and not the correct height for my needs. I wanted a table that was the perfect height and that could fold and store away when not in use. Enter the idea for thus folding laptop and writing table!
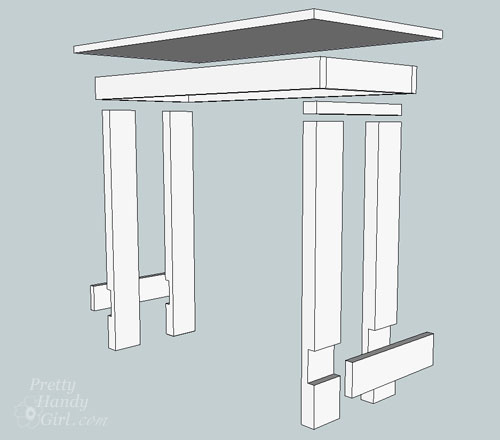
I enjoyed the challenge of designing plans for this simple farmhouse style folding laptop/writing table. The materials are simple 2 x 4’s and 3/4 inch plywood. The majority of the steps can be done using simple handheld tools like a drill, multi-tool, and a circular saw. (Feel free to use other tools or alter the plans to fit your size preferences.)
Materials:
( I’ve included affiliate links for your convenience. I earn a small percentage from a purchase using these links. There is no additional cost to you. You can read more about affiliate links here .)
Cut list:
Top:
- 3/4″ finish grade plywood cut to 18″ x 36″
Apron(use 1″ x 3″ boards or you can rip excess plywood):
- 2 – 1″ x 3″ cut to 14 1/2″
- 2 – 1″ x 3″ cut to 34″
Legs:
- 2 – 2″ x 4″ cut to 28 1/4″
- 2 – 2″ x 4″ cut to 26 3/4″
- 1 – 2″ x 2″ cut to 14 1/2″ (if ripping a 2″ x 2″ yourself, remember actual size is 1.5″ x 1.5″)
- 2 – 1″ x 4″ cut to 14 3/8″
Hardware:
- Handle
- 2 – 2 1/2″ Barrel Bolts
- 4 – 2 1/2″ Utility Hinges
- Finish nails 1 1/2″
- 4 – 1 1/4″ wood screws
- Locking trunk lid hinge
- 1 ¼ Inch Pocket Hole Screws
Tools:
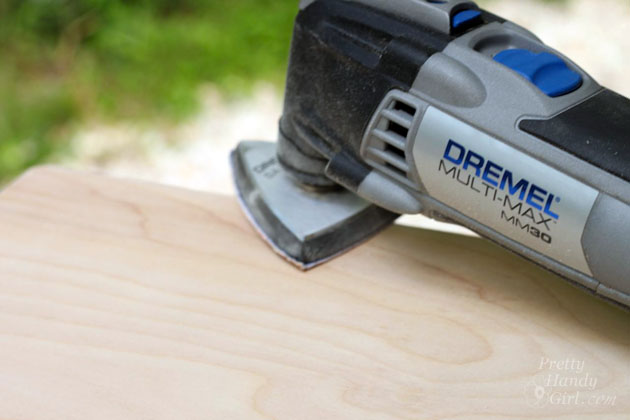
- Dremel Multi-Max or any oscillating multi-tool
- Dremel Ultra-Saw (or circular saw )
- Kreg Jig
- Chisel
- Hammer
- Drill
- Drill bit the same width as the barrel bolt
- Nailgun (optional)
- Iron
- Carpenters Square
- Combination square
Additional materials:
- Sandpaper in 60, 180 & 220 grit
- Wood Stain, Dark Walnut
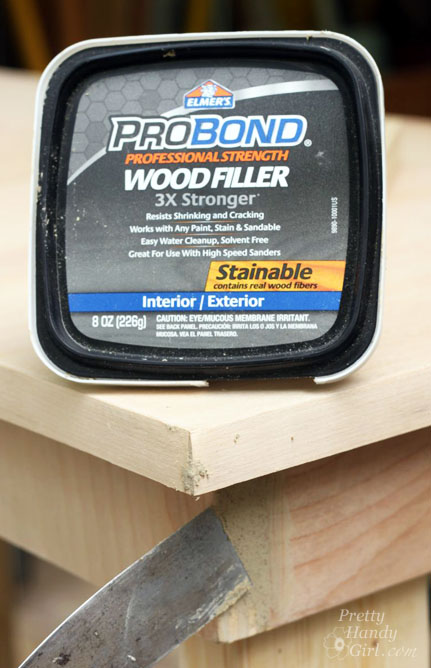
- Stainable Wood Filler
- Putty Knife
- Paintbrush
- Damp rags
- Paint
- Flat Water-based Top Coat
- Birch Edge Banding
- Band-it Edge Trimmer
- Scrap of wood
- Piece of aluminum foil
- Wood glue
- Pencil
Instructions:
Cut your lumber per the above cut list.
Building the Apron:
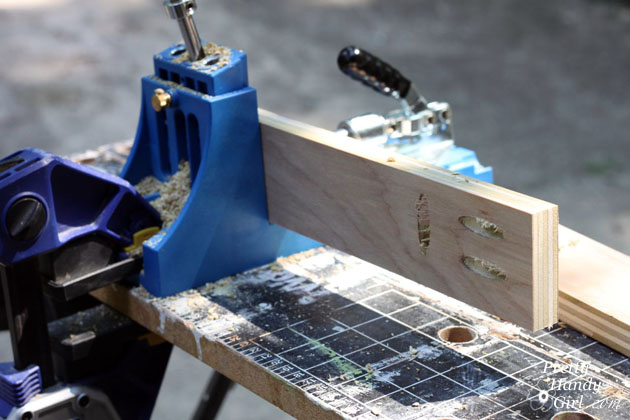
Drill two holes in the ends of the front and back pieces of the apron. Drill pocket holes into the top of all the apron pieces (spaced approximately 8″ apart.)
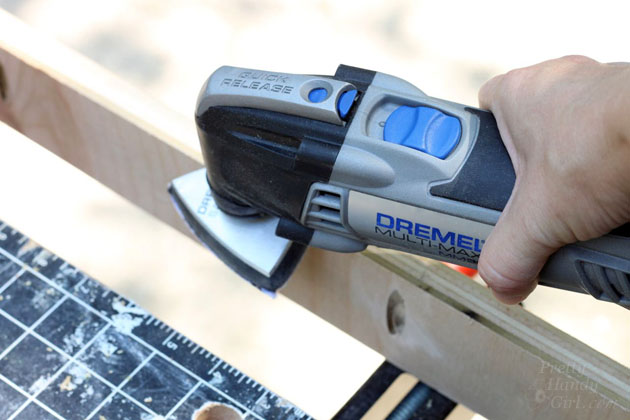
Sand all edges and pocket holes on the apron pieces with a 60 grit sandpaper on the Dremel MultiMax.
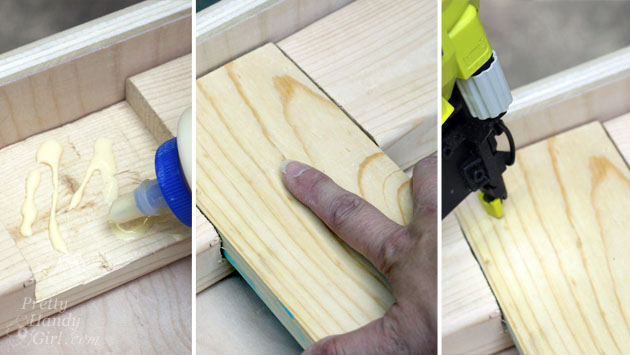
Assemble the apron pieces. Pay attention to make sure all the pocket holes are facing the same direction to attach to the underside of the tabletop. The sides of the apron should be set inside the front and back pieces as shown below:
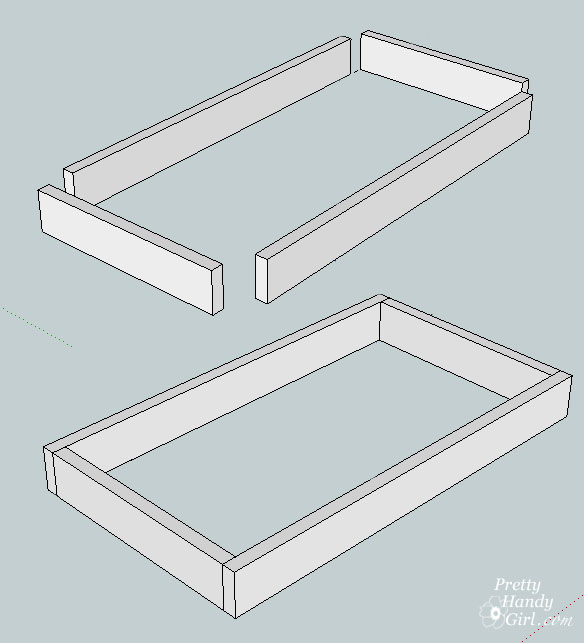
Secure the apron pieces with pocket hole screws.
Center the apron on the bottom side of the tabletop. Measure all sides to make sure they are even. Attach the apron to the tabletop with pocket hole screws.

Notching the legs:
Line up all four legs next to each other. Use a carpenter square to square up the bottoms. Mark 4″ up from the bottom of the legs. Line up the 1″ x 4″ with the mark and trace the other side onto the legs.
Set the combination square to the depth of the 1×4″ board (it should be 3/4″). Mark this depth on the sides of each leg to denote the area that needs to be removed.

Set the depth of your circular saw (or Ultra-Saw) to 3/4″ deep.

Cut stripes inside the guidelines you made on the legs with the Ultra-Saw.

Use a hammer and chisel to knock out the strips. Use your oscillating multi-tool with a wood flush cut blade to clean up the edges of the notch.

Test fit the 1×4″ boards into the legs. Shave off more if needed with the Multi-Max (or circular saw).
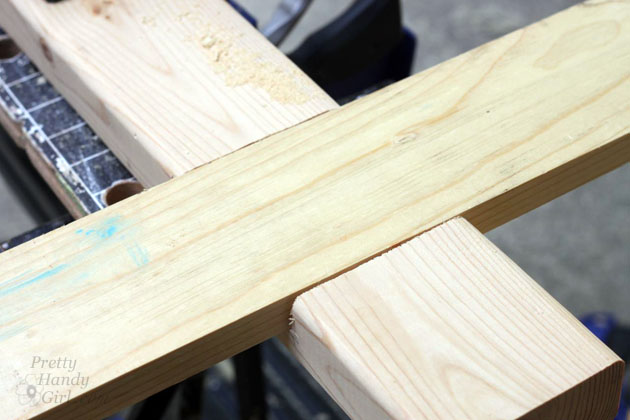
Set the 1″ x 4″ boards into the leg notches.
Secure the 1″ x 4″ boards with wood glue and finish nails.
Secure the cross piece 1″ x 4″ from the back side with one wood screw into each leg.

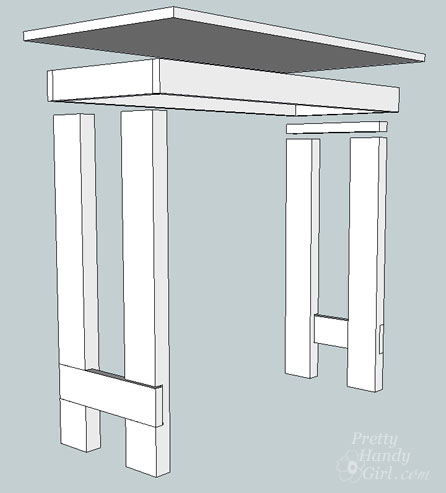
Connecting the Legs:
To allow the legs on the desk to fold neatly, one side has to be raised up to fold on top of the other legs. Use the 2″ x 2″ board you cut for this purpose.
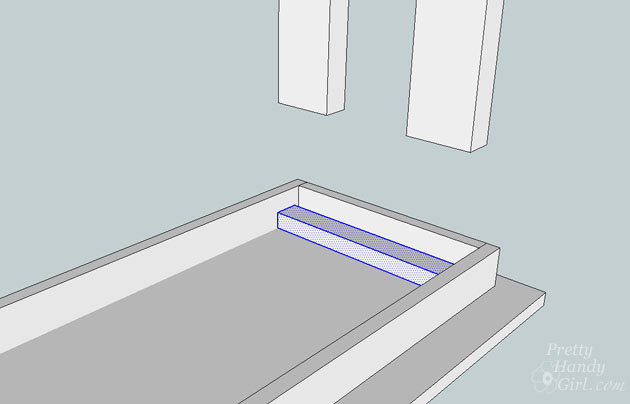
Drill a pocket hole into each end of the 2×2″ board. Add wood glue where the 2×2 will rest. Tap the board into place.
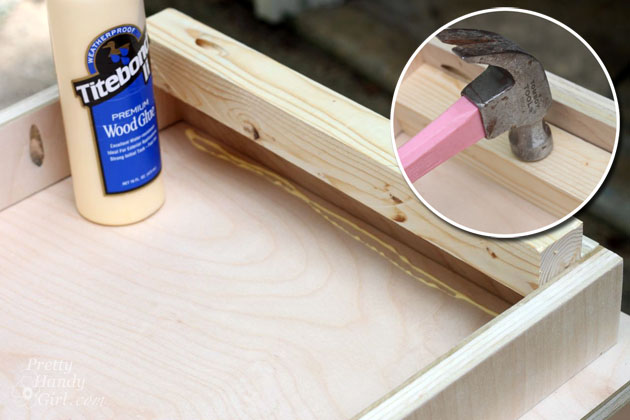
Secure the board into the table apron with pocket screws.
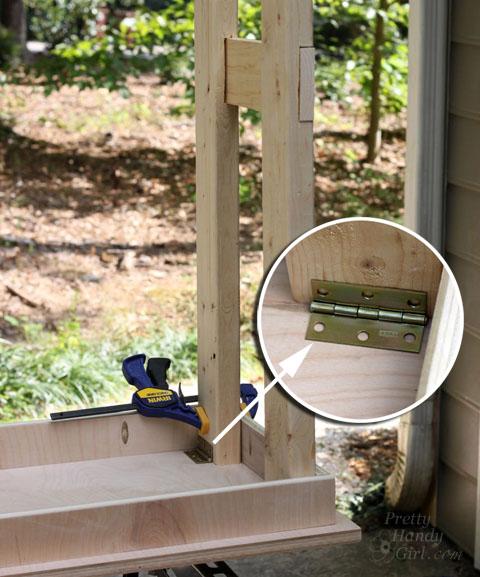
Rest the shorter legs on top of the 2×2 board. Clamp or support the legs in place.

Attach the utility hinges to the top of the legs and the 2×2 support.
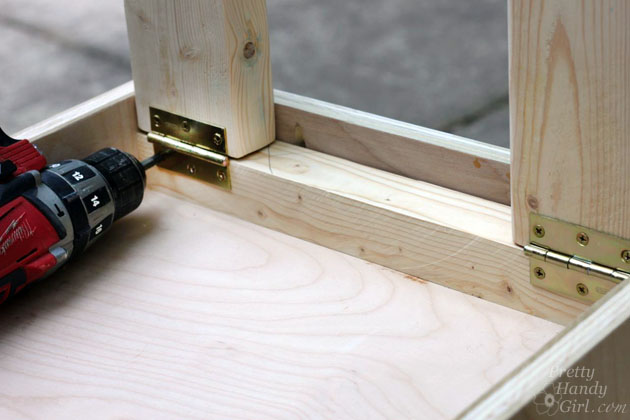
Rest the longer legs in place.

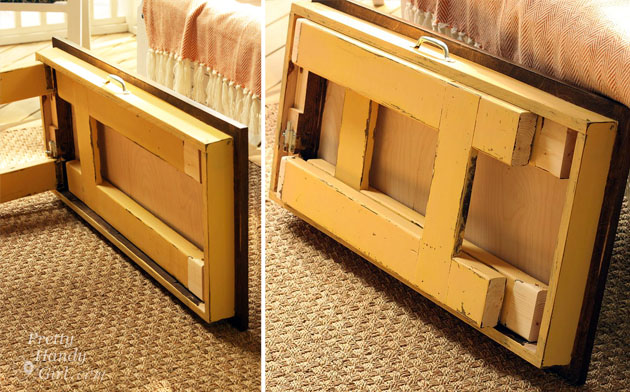
Attach the remaining two utility hinges to the top of the legs and the underside of the tabletop as shown below.
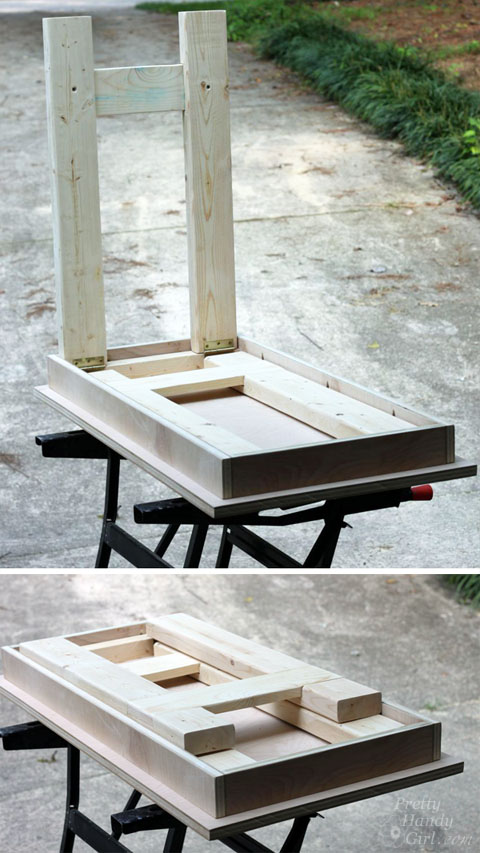
Test fold the legs to make sure they fold neatly and don’t rub on the sides of the apron. Make any adjustments to the hinges or sand the legs to eliminate rubbing now.
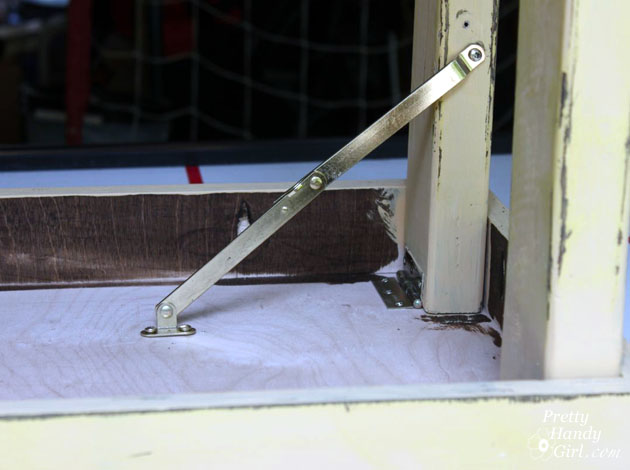
Add the lid support hinge to the bottom folding legs (the longer legs). Follow the directions on the package of the lid support for proper installation.
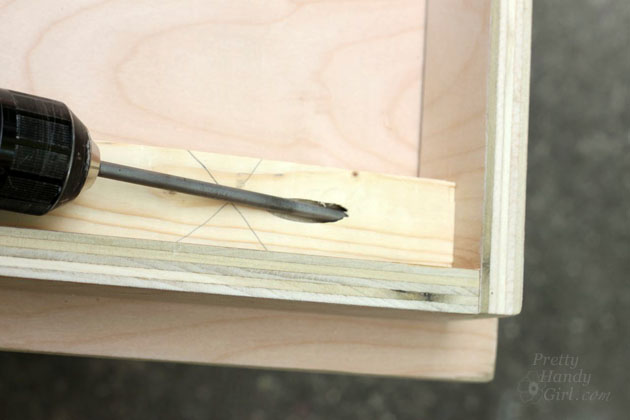
The opposite side will not accommodate a lid support. You need a barrel bolt to keep the legs from folding accidentally. Glue and nail a scrap of 2×4 to the inside of the table apron next to one of the legs (I added a barrel bolt to both sides, but you only need to add it to the one side when using the lid hinge support.)

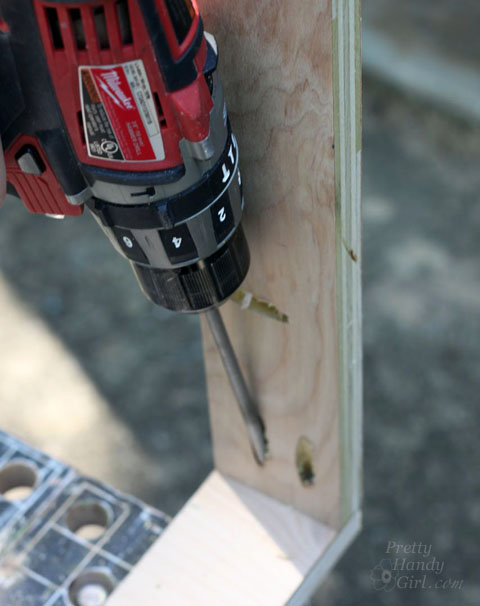
Rest the barrel bolt onto the scrap wood. Mark where the bolt hits the leg. Drill a hole into the leg to accept the bolt.
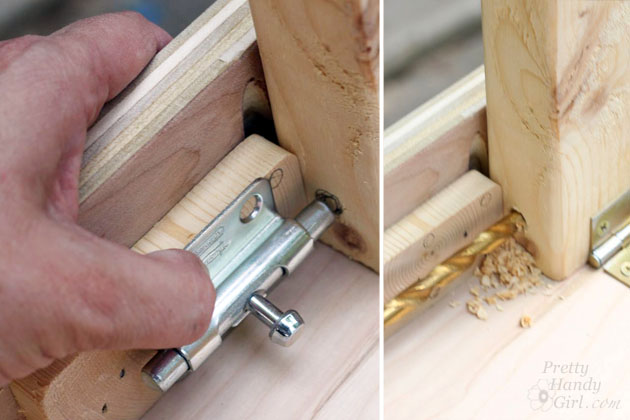
Attach the barrel bolt to the scrap wood with the provided screws.

Sand all parts of the desk starting with 80 grit sandpaper, then 120 and finish with a 220 grit sandpaper.
Add edge banding to the plywood top. You can watch my video below to learn how to finish off plywood edges!
It’s not hard and edge banding is a great way to finish off plywood to make it look like a more expensive board.

Fill any holes or seams with wood putty. Sand and wipe off the desk before staining or painting.
Finishing touches:
I stained my desk with Minwax Dark Walnut. After the stain dried, I added a hand-painted vine border. First, I sketched the design in chalk.
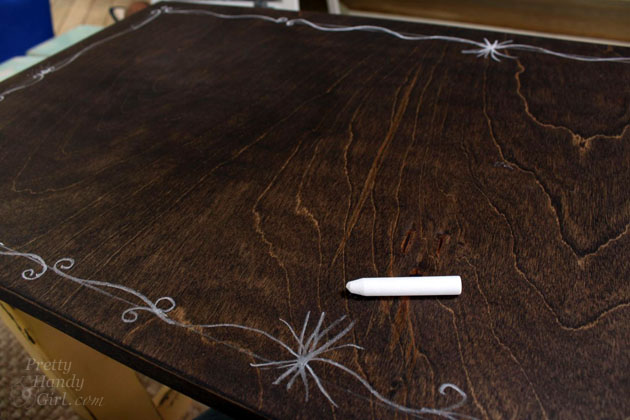
Then I painted the design using a watered-down white chalk paint.
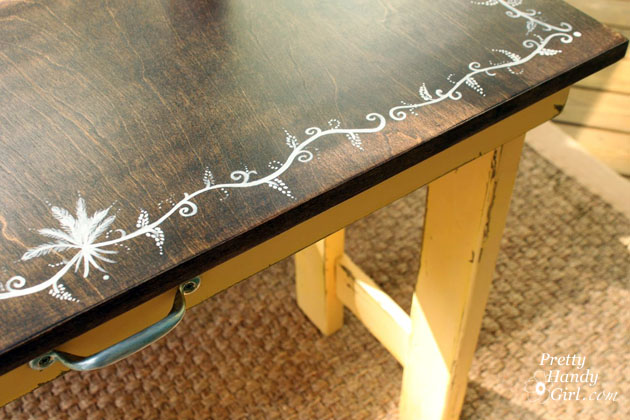
The apron and legs received a mixture of chalk paints in a yellow color. The edges were sanded off to reveal the dark stain beneath.
Finally, the desktop received several coats of General Finishes High Performance water-based topcoat in the flat finish . The legs and painted areas were waxed .

Add a handle to the center of the desk apron if you want to be able to transport it easily.

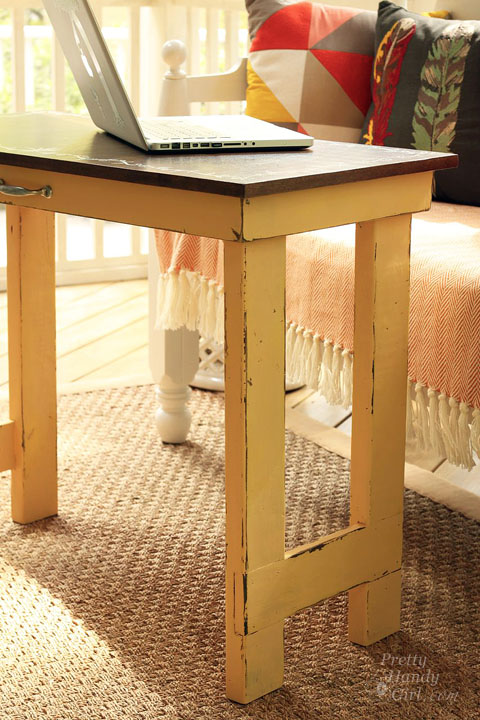
This table can be used anywhere! It’s sturdy, but doesn’t take up much space.

I can fold it up and bring it inside and work in front of the TV. Or it can be used as a small sewing table, crafting table, or just an extra buffet in the dining room.
When I’m done, it folds up and stores behind a bench or sofa.

If you like this tutorial, be sure to pin it for future use or to share! Cheers!

I’d love to hear if you make your own folding laptop and writing table!
![]()
Just incredible, i need one for my little son. thanks for sharing.
[…] I built a folding writing desk so I could work outside. Now my family knows I’m most likely on the porch when they […]
[…] Brittany from Pretty Handy Girl, created this Folding Laptop Writing Desk […]
[…] Folding Laptop / Writing Table by Pretty Handy Girl […]
I love this table and I am going to make it, just the exact thing I was looking for, but I wish you had printer versions of these tutorials. Your directions are clear and concise and pictures are great. But….my printer wants to print it in 48 page!!!! Lots of paper and lots of ink.
You are amazing and I wish I had the courage to try some of these projects!! Love your blog (but don’t subscribe to email updates….. don’t need to as I check it frequently on my own:))
Excellent tutorial! I love this folding table. I’d love to enter the giveaway too, but there is no rafflecopter showing up on your blog for me. 🙁
I love this table and especially the fact that it folds up. I definitely need to make one. Thanks for sharing. Pinning!
You have the best tutorials ever! Great pics & information. This little table is so cool, how hand this would be to have…another to do list coming up for me. Thanks for this & would I ever love this tool…entering now!
once again you hit it out of the park…..so cool love it xx