
Today I’m going to show you how to write a cookbook that both publishers and readers will love.
First, let’s define what publishers think the perfect cookbook manuscript should look like.
- The book has a clearly defined concept. “Just recipes” are not needed by anyone: there are plenty of such books on the Internet. And they are offered for free.
- The author knows what a cookbook should look like: what is the structure, sidebars, annotation, etc.
- The author is well versed in their subject.
- The author wants and can promote themselves and their books.
If all this seems too difficult for you, you need a guide. Such articles will help you with writing a book for Amazon
or any other purposes. You will find out how to write, format, and edit your cookbook so that readers like it.
How to choose a cookbook concept
It is necessary to start work on a book with the development of a concept: what do you want to write about?
The concept can be based on the following parameters:
- Identity of the author (for example, “Notes of a Ship’s Cook”)
- National cuisine
- Place of preparation (“Kindergarten Meals”)
- Diets (“30 Recipes for Weight Loss” or “Nutrition for Diabetes”)
- Specific Ingredient (“30 Rice Dishes”)
- Ingredient missing (“Sugar-Free Desserts” or “Vegan Recipes”)
- Product category (“Vegetable Dishes”)
- Cooking time (“Breakfast in 5 minutes”)
- The cost of products (“Cheap, Tasty and Healthy”)
- Cooking method (“Cooking in a Slow Cooker”)
- Type of dish (“Cakes and pastries,” “Rolls,” “Dumplings”)
- Volume (“Menu for Banquet”)
- Specific target audience (“Bachelor’s Kitchen”)
- Religion (“Lenten Food”)
- Customs and holidays (“New Year’s Recipes”)
- History (“Old French Cuisine”)
- and so on.
Author identity
The identity of the author is of great importance – first of all, because there are a huge number of poor books on the market, made up of unverified recipes pulled from the Web.
If the author is a serious professional and/or they have their own audience on social networks, it will be much easier to sell such a book. Therefore, if your dream is to write cookbooks, the first step in this direction is to gain in-depth knowledge and gain credibility in social networks.
What separates a pro from an amateur?
You should read cookbooks by other authors attentively. This gives an understanding of what exactly should be inserted into your book and what should never be done.
You should check all your recipes in practice at least twice. You need to make sure that the proportions are correct, that the weights are indicated correctly, and that the taste is obtained as desired. You can’t rely on editors: they will miss such errors.
Book appearance
It is advisable to think in advance in what form your book should be published: hardcover, softcover, spring book, or a set of cards. The structure of your cookbook will directly depend on this.
Go to the nearest bookstore and see what is being sold and in what form. This will help you understand exactly what publishers are interested in.
Book structure
The structure of your book might look something like this:
- Introduction – what this book is about, who it is for, and why you decided to write it.
- Equipment – what you need for cooking.
- Products – tips for choosing and storing.
- Recipes are divided into chapters. For example, snacks, soups, main courses, desserts, and drinks. Each chapter, as a rule, is supplied with a short introductory article.
- Table of measures and weights.
- Alphabetical index
In the end, you can give tips on decorating dishes, serving, etc.
Formatting of a recipe
The recipe might look something like this:
- Name of the dish
- Brief description of the dish
- How many servings is this recipe for?
- How many calories are in one serving?
- Ingredients. Use a single formatting style and a single measuring system. For example, if you started referring to “tablespoon” as “tbsp.” – the same designation should be present everywhere.
- A detailed description of the recipe. Here, too, it is important to observe the unity of the format. If you started writing in the imperative mood (“Take three teaspoons”) – use it in all recipes.
Each recipe can be provided with tips – “Important!”.
Of course, not all of these items are mandatory, but the more complete the information about the dish, the better.
Who provides the photos?
Some publishers have their own kitchens with photo studios, some accept photos from authors, and some buy stock photos (which, of course, is not the best option).
If you don’t take pictures yourself, you need to write down what should be shown in the photographs (including step-by-step photographs).
Arrange in advance with the editor that they will show you options for photos. Otherwise, it may turn out that a photograph of a carbonara will be attached to your bolognese.
Text for the back cover
To design a book, you will need an abstract and brief information about the author.
They appear on the back cover and are also used in the publisher’s documentation and promotional materials.
When it comes to effortless and satisfying meals, casseroles take center stage. These one-dish wonders offer a perfect combination of flavors and textures that are sure to please the entire family. From creamy chicken pasta casserole
to hearty meat and vegetable medleys, easy casserole recipes are a go-to solution for busy weeknights or lazy weekends.
In this blog post, we will explore a selection of mouthwatering and straightforward casserole recipes that will have you enjoying delicious comfort food with minimal effort. Get ready to discover the joy of effortless cooking and the delicious results that await!
Classic Mac and Cheese Casserole:
Mac and cheese is a timeless comfort food favorite, and transforming it into a casserole takes it to a whole new level of goodness. Here’s a simple yet delightful recipe:
Ingredients:
– 8 ounces (225g) elbow macaroni
– 2 cups (480ml) milk
– 2 cups (200g) shredded cheddar cheese
– 1/4 cup (30g) all-purpose flour
– 2 tablespoons (30g) butter
– 1/2 teaspoon mustard powder
– Salt and pepper to taste
– Optional toppings: breadcrumbs, grated Parmesan cheese
Instructions:
1. Preheat your oven to 350°F (175°C) and lightly grease a baking dish.
2. Cook the macaroni according to package instructions until al dente. Drain and set aside.
3. In a saucepan, melt the butter over medium heat. Stir in the flour and mustard powder to make a roux.
4. Gradually whisk in the milk, ensuring there are no lumps. Cook the sauce until it thickens and coats the back of a spoon.
5. Remove the saucepan from the heat and stir in the shredded cheddar cheese until melted and smooth.
6. Season the cheese sauce with salt and pepper to taste. Add the cooked macaroni and stir until well-coated.
7. Transfer the mac and cheese mixture to the greased baking dish. If desired, sprinkle breadcrumbs or grated Parmesan cheese on top for a crispy crust.
8. Bake for 20-25 minutes or until the top is golden and bubbling. Let it cool slightly before serving.
2. Chicken and Vegetable Casserole:
This chicken and vegetable casserole is a wholesome and flavorful option for a well-rounded meal. Here’s a recipe that combines tender chicken, colorful vegetables, and a creamy sauce:
Ingredients:
– 2 pounds (900g) boneless, skinless chicken breasts, cut into bite-sized pieces
– 1 medium onion, diced
– 2 cloves of garlic, minced
– 2 cups (240g) mixed vegetables (carrots, peas, bell peppers, etc.)
– 1 can (10.75 oz) condensed cream of chicken soup
– 1 cup (240ml) chicken broth
– 1 cup (240ml) milk or heavy cream
– 1 teaspoon dried herbs (such as thyme or rosemary)
– Salt and pepper to taste
– 2 cups (200g) cooked rice or pasta (optional)
Instructions:
1. Preheat your oven to 375°F (190°C) and lightly grease a casserole dish.
2. In a large skillet, sauté the diced onion and minced garlic until fragrant and translucent.
3. Add the chicken pieces to the skillet and cook until browned on all sides. Remove from heat.
4. In a separate bowl, combine the condensed cream of chicken soup, chicken broth, milk or cream, dried herbs, salt, and pepper. Stir well to ensure the ingredients are fully incorporated.
5. Add the mixed vegetables to the skillet with the cooked chicken, and mix to combine.
6. Pour the soup mixture evenly over the chicken and vegetables, making sure everything is well-coated.
7. If using, add the cooked rice or pasta to the casserole dish and mix well with the other ingredients.
8. Cover the casserole dish with aluminum foil and bake in the preheated oven for about 30 minutes.
9. After 30 minutes, remove the foil and continue baking for an additional 10-15 minutes, or until the casserole is golden and bubbly.
10. Once cooked, remove the casserole from the oven and let it rest for a few minutes before serving. This allows the flavors to meld together and the casserole to set slightly.
11. Serve the chicken and vegetable casserole hot and enjoy the delicious combination of tender chicken, flavorful vegetables, and creamy sauce.
Note: Feel free to customize the recipe by adding or substituting vegetables according to your preference. You can also sprinkle shredded cheese on top during the last few minutes of baking for an extra cheesy finish.
Cheesy Chicken and Broccoli Casserole:
Ingredients:
– 2 cups cooked chicken, shredded or diced
– 2 cups fresh broccoli florets
– 1 cup cooked rice
– 1 small onion, finely chopped
– 2 cloves garlic, minced
– 1 cup shredded cheddar cheese
– 1 cup shredded mozzarella cheese
– 1 can condensed cream of chicken soup
– 1/2 cup milk
– 1/2 teaspoon dried thyme
– Salt and pepper to taste
– Optional toppings: breadcrumbs, grated Parmesan cheese
Instructions:
1. Preheat your oven to 375°F (190°C) and grease a casserole dish.
2. In a large mixing bowl, combine the cooked chicken, broccoli florets, cooked rice, chopped onion, minced garlic, shredded cheddar cheese, and shredded mozzarella cheese. Mix well to evenly distribute the ingredients.
3. In a separate bowl, whisk together the condensed cream of chicken soup, milk, dried thyme, salt, and pepper until well combined. Pour the mixture over the chicken and broccoli mixture in the large mixing bowl. Stir until all ingredients are coated with the creamy sauce.
4. Transfer the mixture to the greased casserole dish, spreading it out evenly. If desired, sprinkle breadcrumbs or grated Parmesan cheese on top for a crispy and golden crust.
5. Cover the casserole dish with aluminum foil and bake in the preheated oven for 20 minutes. This allows the flavors to meld together and the broccoli to cook slightly.
6. After 20 minutes, remove the foil and continue baking for an additional 15-20 minutes or until the casserole is bubbly, the cheese is melted and golden, and the broccoli is tender.
7. Once cooked, remove the casserole from the oven and let it rest for a few minutes before serving. This allows the flavors to settle and the casserole to set slightly.
8. Serve the cheesy chicken and broccoli casserole warm, and enjoy the comforting flavors that come together in this simple homemade dish.
Variations and Tips:
– For added protein, you can include cooked bacon or ham in the casserole.
– Feel free to substitute the broccoli with other vegetables such as cauliflower, peas, or mixed vegetables.
– Experiment with different types of cheese to suit your taste preferences.
– To make the casserole more substantial, you can add cooked pasta or quinoa instead of rice.
– Make it your own by incorporating your favorite herbs and spices to enhance the flavor profile.
Homemade casseroles offer a delightful and fuss-free way to enjoy a comforting and flavorful meal. With this easy cheesy chicken and broccoli casserole recipe, you can create a satisfying dish that requires minimal effort and ingredients you likely already have on hand. So, gather your ingredients, preheat your oven, and embark on a culinary adventure that will leave your taste buds craving more. Enjoy the warmth and deliciousness that a homemade casserole brings, and savor every comforting bite!

Photo: Strawberry Rhubarb Crisp by Alicia, Attribution-NonCommercial 2.0 Generic (CC BY-NC 2.0)
Rhubarb Compote: Simmer chopped rhubarb with sugar and water until it breaks down intoa sweet, tangy compote. Serve it over yogurt or ice cream, or use it as a topping for pancakes or waffles.
Rhubarb Crisp: Combine chopped rhubarb with a simple crumble topping made from flour, sugar, butter, and oats. Bake until golden brown and serve warm with vanilla ice cream.
Rhubarb Muffins: Fold chopped rhubarb into your favourite muffin batter and bake until golden brown. These muffins are perfect for breakfast or an afternoon snack.
Rhubarb Chutney: Simmer chopped rhubarb with vinegar, sugar, and spices until it thickens into a flavorful chutney. Serve it with grilled meats or spread it on sandwiches.
Rhubarb Jam: Cook chopped rhubarb with sugar and lemon juice until it thickens into a delicious jam. Spread it on toast, scones, or biscuits.
Rhubarb BBQ Sauce: Combine chopped rhubarb with ketchup, vinegar, brown sugar, and spices to create a tangy and sweet BBQ sauce. Use it to glaze grilled chicken, pork, or tofu.
Rhubarb Lemonade: Mix fresh rhubarb juice with lemon juice and simple syrup to make a refreshing summer drink. Add a splash of vodka or gin for a grown-up version.
Rhubarb Salsa: Combine diced rhubarb with chopped red onion, jalapeno, cilantro, and lime juice for a sweet and spicy salsa. Serve it with tortilla chips or use it as a topping for grilled fish.
Rhubarb Smoothie: Blend frozen rhubarb with yogurt, honey, and a splash of milk for a healthy and delicious smoothie. Add a handful of spinach for an extra boost of nutrients.
Rhubarb Salad Dressing: Puree cooked rhubarb with olive oil, honey, mustard, and vinegar to make a tangy and sweet salad dressing. Drizzle it over mixed greens, roasted vegetables, or grilled meats.
Rhubarb Galette: Roll out a sheet of store-bought puff pastry and place it on a baking sheet. Spread chopped rhubarb over the pastry, leaving a border around the edges. Sprinkle with sugar and fold the edges of the pastry up and over the rhubarb. Bake until the pastry is golden brown and the rhubarb is tender.
Rhubarb and Strawberry Smoothie Bowl: Blend frozen rhubarb and strawberries with yogurt and a splash of milk until smooth. Pour the smoothie into a bowl and top with sliced fresh strawberries, granola, and a drizzle of honey. Enjoy as a healthy and filling breakfast or snack.
Rhubarb Upside-Down Cake: Melt butter and brown sugar in a cast-iron skillet over medium heat. Add chopped rhubarb and cook for a few minutes until it starts to soften. Pour cake batter over the rhubarb and bake in the oven until the cake is golden brown and the rhubarb is tender. Invert the skillet onto a plate to reveal a delicious upside-down cake with a caramelized rhubarb topping.
Rhubarb and Custard Tartlets: Roll out store-bought pie crust and use a cookie cutter to cut circles that fit into a muffin tin. In a bowl, mix chopped rhubarb with sugar, cornstarch, and a pinch of cinnamon. Fill each pie crust circle with the rhubarb mixture and bake until the crust is golden brown and the rhubarb is tender. Serve with a dollop of custard on top.
Rhubarb and Ginger Cocktail: In a cocktail shaker, muddle chopped rhubarb and fresh ginger with a splash of simple syrup. Add vodka and lime juice and shake well. Strain into a glass filled with ice and top with soda water. Garnish with a slice of lime and a sprig of fresh mint.
Bonus -Strawberry Rhubarb Crisp Recipe:
Ingredients:
4 cups chopped rhubarb
2 cups chopped strawberries
1/2 cup all-purpose flour
1/2 cup brown sugar
1/2 cup rolled oats
1/2 cup unsalted butter, softened
1 tsp ground cinnamon
1/4 tsp salt
Vanilla ice cream, for serving
Instructions:
Preheat the oven to 375°F (190°C).
In a large bowl, combine the chopped rhubarb and strawberries.
In a separate bowl, mix together the flour, brown sugar, rolled oats, cinnamon, and salt.
Cut in the softened butter using a pastry blender or your fingers, until the mixture resembles coarse crumbs.
Sprinkle the crumb mixture evenly over the rhubarb and strawberry mixture, pressing down gently.
Bake the crisp in the preheated oven for 35-40 minutes, or until the topping is golden brown and the fruit is bubbly.
Remove the crisp from the oven and let it cool for a few minutes before serving.
Serve warm with a scoop of vanilla ice cream on top.

Kombucha is a fermented tea that has been enjoyed for centuries in many parts of the world. It is made by combining tea, sugar, and a SCOBY (symbiotic culture of bacteria and yeast) to create a tangy, effervescent drink. In recent years, kombucha has become increasingly popular in the Western world, not only for its unique flavour but also for its potential health benefits.
Here are some of the health benefits of kombucha:
1. Digestive Health
Kombucha contains beneficial bacteria and yeast that can promote a healthy gut microbiome. These probiotics can help to improve digestion and reduce inflammation in the gut. Additionally, kombucha contains acetic acid, which can stimulate the production of stomach acid and improve digestion.
2. Immune System Support
The probiotics in kombucha can also support the immune system by promoting the growth of beneficial bacteria in the gut. This can help to reduce the risk of infections and other illnesses. Additionally, kombucha contains antioxidants that can help to protect the body against oxidative stress and inflammation.
3. Detoxification
Kombucha contains a variety of compounds that can help to support the body’s natural detoxification processes. For example, it contains glucaric acid, which can help the liver to remove toxins from the body. Additionally, kombucha contains antioxidants that can help to protect the liver from damage caused by toxins.
4. Joint Health
Kombucha contains glucosamines
, which are compounds that are important for joint health. Glucosamine can help to reduce inflammation in the joints and promote the production of collagen, which is important for maintaining healthy cartilage.
5. Mental Health
The probiotics in kombucha may also have a positive impact on mental health. Research has shown that a healthy gut microbiome is important for mental health, and probiotics may be able to improve mood and reduce symptoms of anxiety and depression.
How to Make Kombucha
Making kombucha at home is relatively simple, and it only requires a few ingredients. Here’s what you’ll need:
•1 SCOBY
•1 cup of sugar
•8 tea bags or 2 tablespoons of loose tea
•1 gallon of water
•Glass jars for fermentation
•A cloth or coffee filter to cover the jars
Flavourings(optional)
To make kombucha, follow these steps:
. 1Boil the water and steep the tea bags or loose tea for 10-15 minutes.
2. Remove the tea bags or strain out the loose tea.
3. Add the sugar to the hot tea and stir until dissolved.
4, Allow the tea to cool to room temperature.
5. Pour the tea into the fermentation jars and add the SCOBY.
6. Cover the jars with a cloth or coffee filter and secure them with a rubber band.
7. Allow the kombucha to ferment for 7-14 days, depending on your preference for taste and carbonation.
8. Once the kombucha has fermented to your liking, remove the SCOBY and reserve a cup of the liquid as a starter for your next batch.
9. Bottle the remaining kombucha and add any flavourings you desire, such as fruit juice, ginger, or herbs.
10. Allow the bottled kombucha to sit at room temperature for 1-2 days to carbonate, then refrigerate.
Making homemade sauces
is a great way to elevate your cooking game and add flavour and depth to your dishes. While store-bought sauces are convenient, making your own from scratch allows you to control the ingredients and tailor the sauce to your tastes. Here are some classic sauce recipes and tips for making them at home:
Classic Marinara Sauce:
Ingredients:
•2 tablespoons olive oil
•1 small onion, chopped
•2 cloves garlic, minced
•28-ounce can of crushed tomatoes
•1 teaspoon dried oregano
•Salt and pepper to taste
Instructions:
1Heat the olive oil in a saucepan over medium heat.
2Add the onion and garlic and cook until softened.
3Add the crushed tomatoes and oregano and bring to a simmer.
4Reduce the heat to low and let the sauce simmer for 20-30 minutes, stirring occasionally.
5. Season with salt and pepper to taste.
6Use an immersion blender to puree the sauce to your desired consistency.
Tips:
•Use San Marzano canned tomatoes for a sweeter and less acidic sauce.
•Add a pinch of sugar to balance the acidity of the tomatoes.
•For a chunkier sauce, use diced tomatoes instead of crushed ones.
Hollandaise Sauce:
Ingredients:
•3 egg yolks
•1 tablespoon lemon juice
•1/2 cup unsalted butter, melted
Instructions:
1 In a double boiler or heatproof bowl set over a saucepan of simmering water, whisk the egg yolks and lemon juice until thickened and doubled in volume.
2 Gradually pour in the melted butter, whisking constantly, until the sauce thickens.
3 Season with salt and cayenne pepper to taste.
4 Serve immediately.
Tips:
•Use room-temperature eggs for a smoother sauce.
•If the sauce is too thick, whisk in a teaspoon of warm water at a time until it reaches your desired consistency.
•Keep the sauce warm in a heatproof bowl set over a pot of warm water, whisking occasionally, until ready to serve.
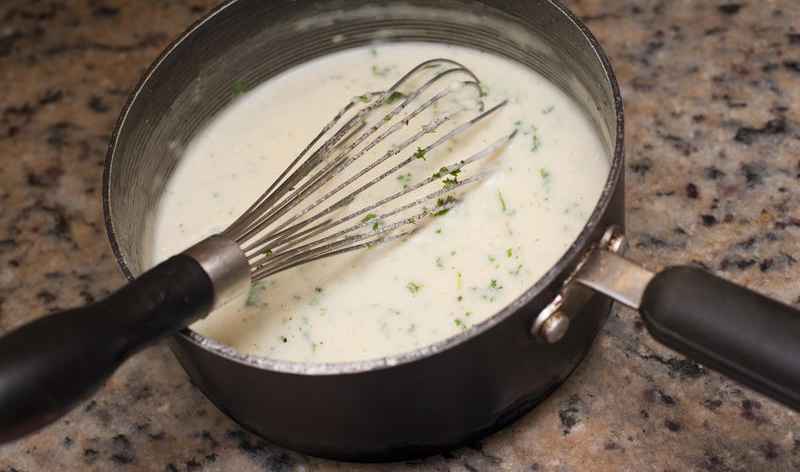
Béchamel Sauce:
Ingredients:
•2 tablespoons unsalted butter
•2 tablespoons all-purpose flour
•2 cups whole milk, warmed
•Salt and white pepper to taste
Instructions:
1 In a saucepan, melt the butter over medium heat.
2 Add the flour and whisk until smooth.
3 Gradually pour in the warm milk, whisking constantly, until the sauce thickens.
4 Season with salt, white pepper, and nutmeg (if using) to taste.
5 Use immediately or let cool and store in the refrigerator for up to 3 days.
Tips:
•Use a whisk to prevent lumps from forming in the sauce.
•Warm the milk in the microwave or on the stove before adding it to the saucepan.
•Use this sauce as a base for macaroni and cheese or as a topping for vegetables and baked dishes.
Pesto Sauce:
Ingredients:
•2 cups fresh basil leaves, packed
•2 cloves garlic, minced
•1/4 cup pine nuts, toasted
•1/2 cup grated Parmesan cheese
•1/2 cup extra-virgin olive oil
•Salt and pepper to taste
Instructions:
1 In a food processor, combine the basil, garlic, pine nuts, and Parmesan cheese.
2 Pulse until coarsely chopped.
3 With the food processor running, slowly pour in the olive oil through the feed tube until the sauce is smooth.
4. Season with salt and pepper to taste.
5 Serve immediately or store in an airtight container in the refrigerator for up to a week.
Tips:
•Toast the pine nuts in a dry skillet over medium heat for 2-3 minutes until lightly golden.
•Add a squeeze of lemon juice for a brighter flavour.
•Use this sauce as a pasta sauce, pizza topping, or spread on sandwiches and crostini.
Chimichurri Sauce:
Ingredients:
•1 cup fresh parsley leaves, packed
•1/2 cup fresh cilantro leaves, packed
•3 cloves garlic, minced
•1/4 cup red wine vinegar
•1/2 cup extra-virgin olive oil
•1/2 teaspoon dried oregano
•1/4 teaspoon red pepper flakes
•Salt and pepper to taste
Instructions:
1 In a food processor or blender, combine the parsley, cilantro, garlic, red wine vinegar, oregano, and red pepper flakes.
2 Pulse until coarsely chopped.
3 With the motor running, slowly pour in the olive oil until the sauce is smooth.
4 Season with salt and pepper to taste.
5 Serve immediately or store in an airtight container in the refrigerator for up to a week.
Tips:
•Use red wine vinegar for an authentic flavour, but you can substitute with other vinegar varieties.
•Add a splash of water to thin out the sauce if it’s too thick.
•Use this sauce as a marinade for meats, a topping for grilled vegetables, or as a condiment for sandwiches and tacos.

Asparagus is a popular vegetable that is widely enjoyed around the world for its unique flavour and nutritional value. Here is some information about asparagus that you might find useful:
Nutrition:Asparagus is low in calories and a good source of fibre, vitamins A, C, E, and K, folate, and minerals such as iron, calcium, and potassium.
Varieties: There are over 300 varieties of asparagus, but the most common types are green, white, and purple.
Harvest: Asparagus is harvested in the spring and early summer months, typically from March to June in the Northern Hemisphere.
Health benefits:Asparagus is considered a superfood due to its numerous health benefits. It is known to promote healthy digestion, reduce inflammation, boost immunity, and support healthy weight loss.
Cooking methods: Asparagus can be cooked in a variety of ways, including roasting, grilling, boiling, steaming, and sautéing.
Preparation: To prepare asparagus, you should wash it thoroughly and trim the tough, woody ends. You can also peel the tough outer layer of white asparagus if desired.
Storage: Asparagus should be stored in the refrigerator in a plastic bag or wrapped in a damp paper towel to keep it fresh. It should be consumed within a few days of purchase.
Culinary uses:Asparagus can be used in a variety of dishes, including soups, salads, stir-fries, omelets, and pasta dishes.
Asparagus urine odour: Some people may notice a strong odour in their urine after eating asparagus. This is caused by a compound called asparagusic acid, which is broken down in the body into volatile sulphur compounds that are released in the urine.
Our Top 5 Asparagus Recipes
Here are five delicious asparagus recipes to try:
Roasted Asparagus:Preheat your oven to 400°F (200°C). Trim the tough ends of the asparagus and toss them with olive oil, salt, and pepper. Roast for about 15-20 minutes, until the asparagus is tender and lightly browned. You can also add garlic or lemon juice for extra flavour.
Asparagus Soup: In a large pot, sauté chopped onions and garlic in butter until soft. Add chopped asparagus and vegetable broth and simmer for about 20 minutes, until the asparagus is tender. Puree the soup in a blender or with an immersion blender until smooth. Stir in heavy cream, salt, and pepper to taste.
Asparagus Risotto:In a large pot, sauté chopped onions and garlic in butter until soft. Add Arborio rice and stir until coated with the butter. Add white wine and stir until absorbed. Gradually add hot chicken or vegetable broth, stirring constantly, until the rice is tender and creamy. Stir in chopped asparagus, grated Parmesan cheese, and salt and pepper to taste.
Asparagus and Mushroom Quiche: Preheat your oven to 375°F (190°C). In a large bowl, whisk together eggs, milk, salt, and pepper. Stir in cooked asparagus and sautéed mushrooms. Pour the mixture into a pie crust and bake for about 40-45 minutes, until the filling is set and golden brown.
G rilled Asparagus Salad:Preheat your grill to medium-high heat. Toss trimmed asparagus with olive oil, salt, and pepper. Grill for about 5-7 minutes until the asparagus is lightly charred and tender. Arrange the asparagus on a bed of mixed greens and top with cherry tomatoes, feta cheese, and a balsamic vinaigrette dressing.
